When I’m not destroying renovating my home and going to my day-job that makes all of this magic possible, I take a furniture building class at the local City College.  Since this blog is called “Building With Beth” I though that it might be an appropriate forum to show you what I’ve been working on outside of the house.

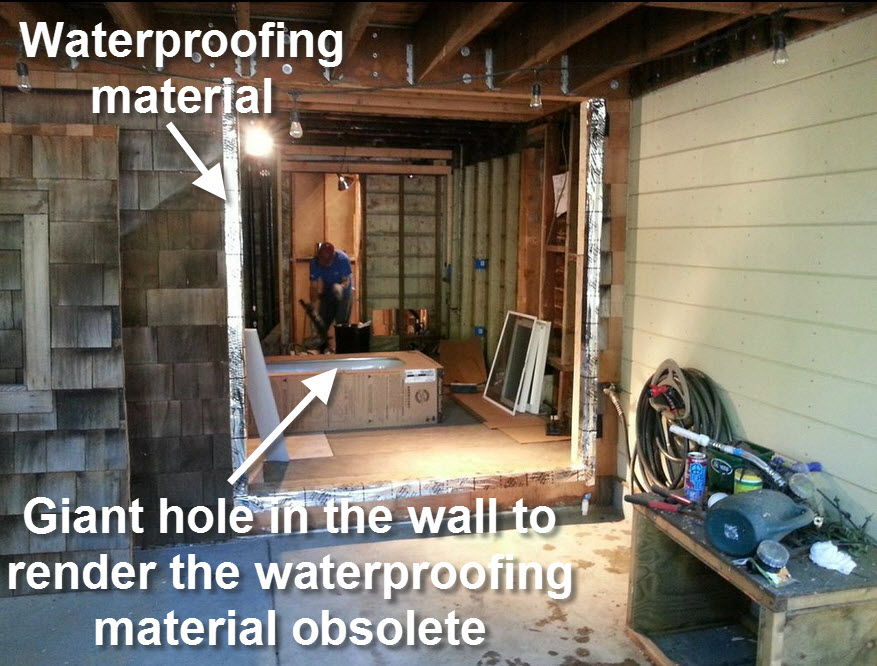
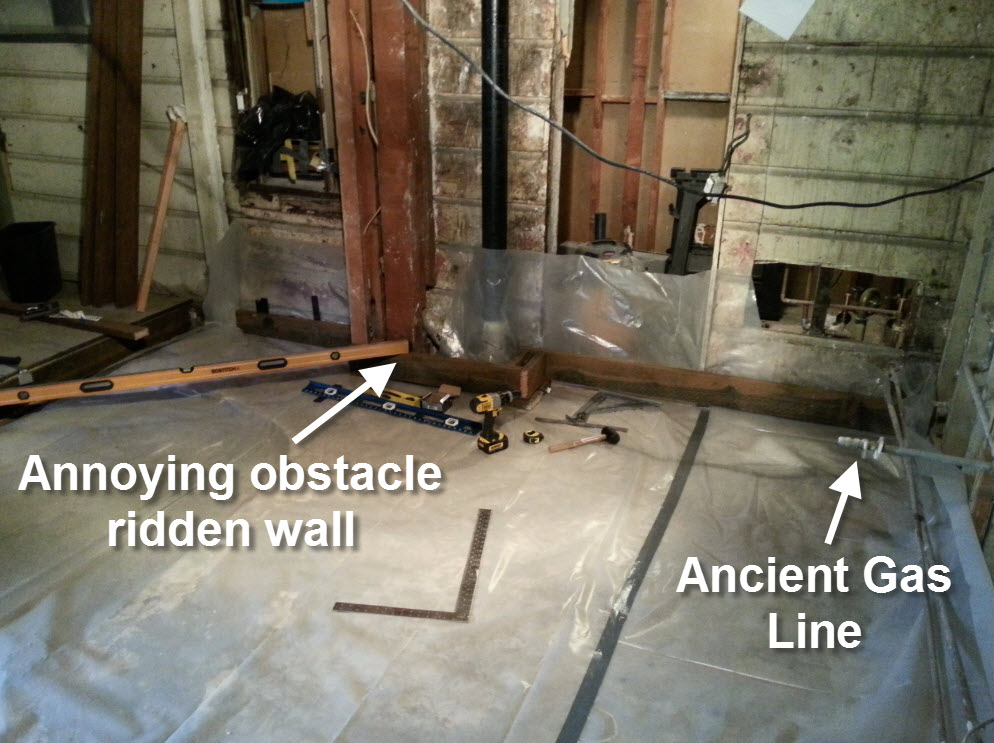
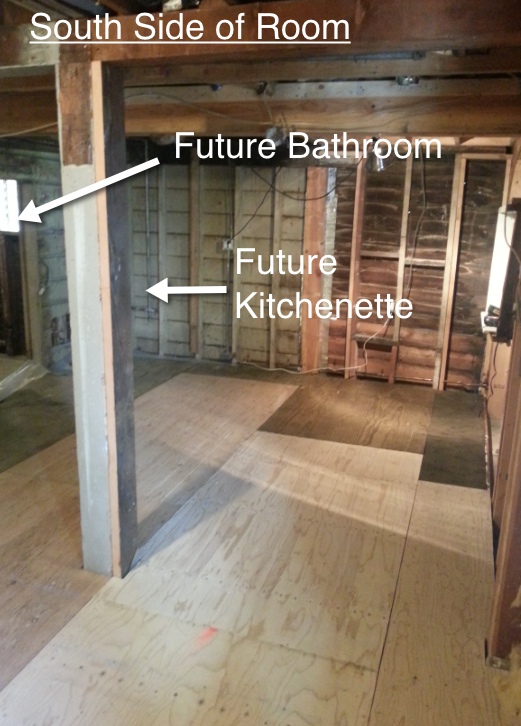
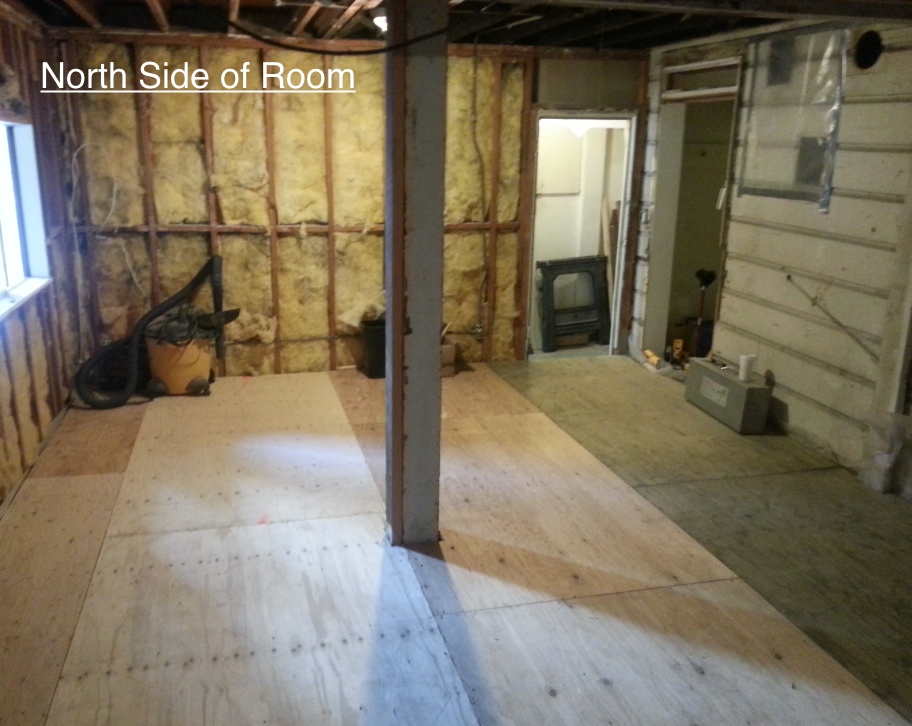
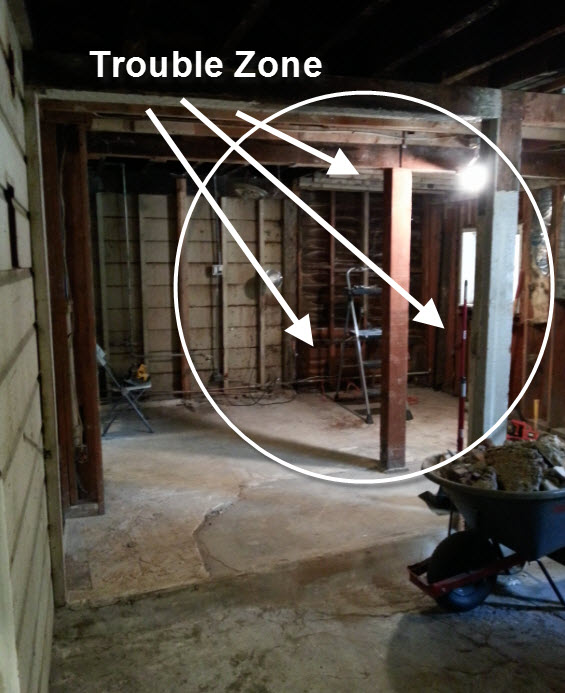
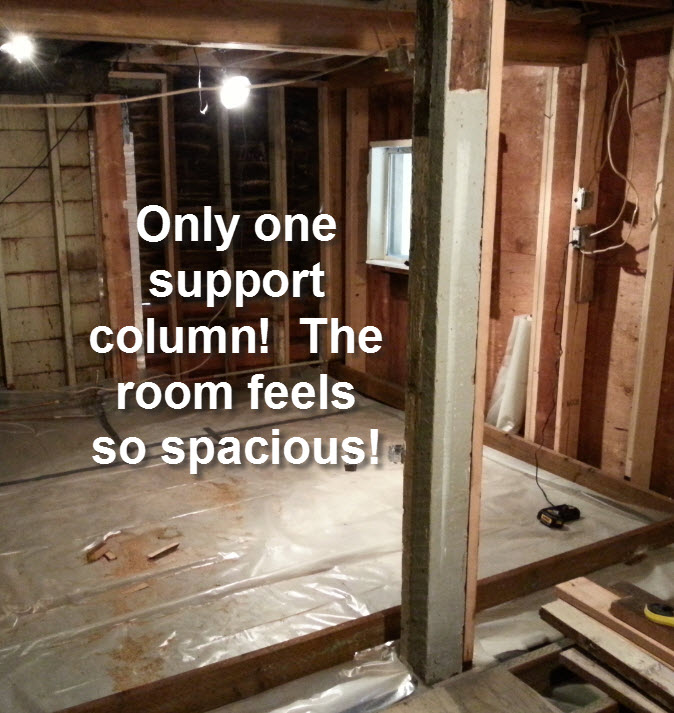
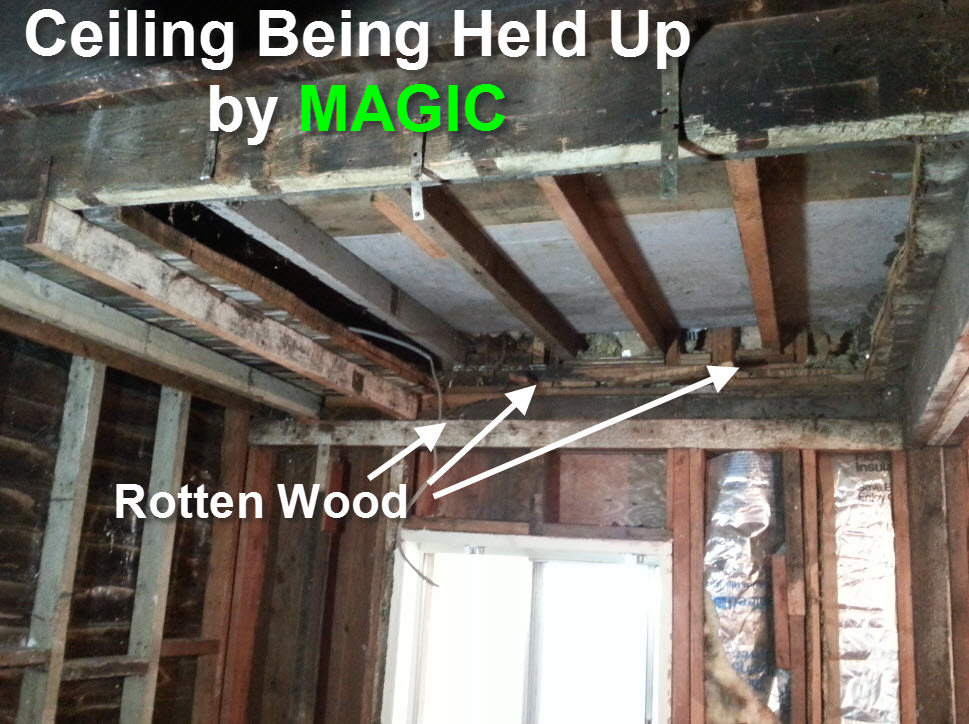
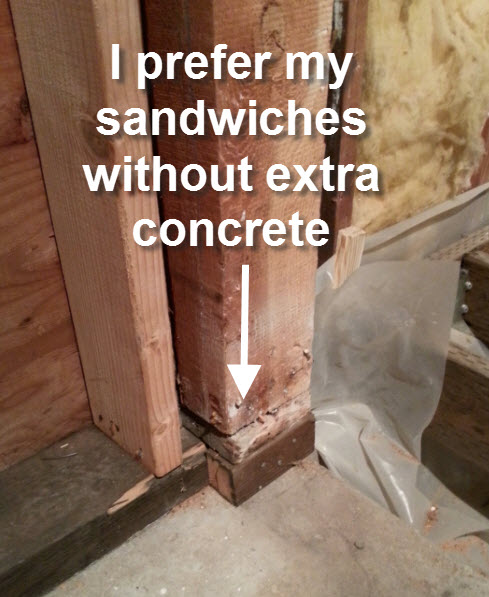
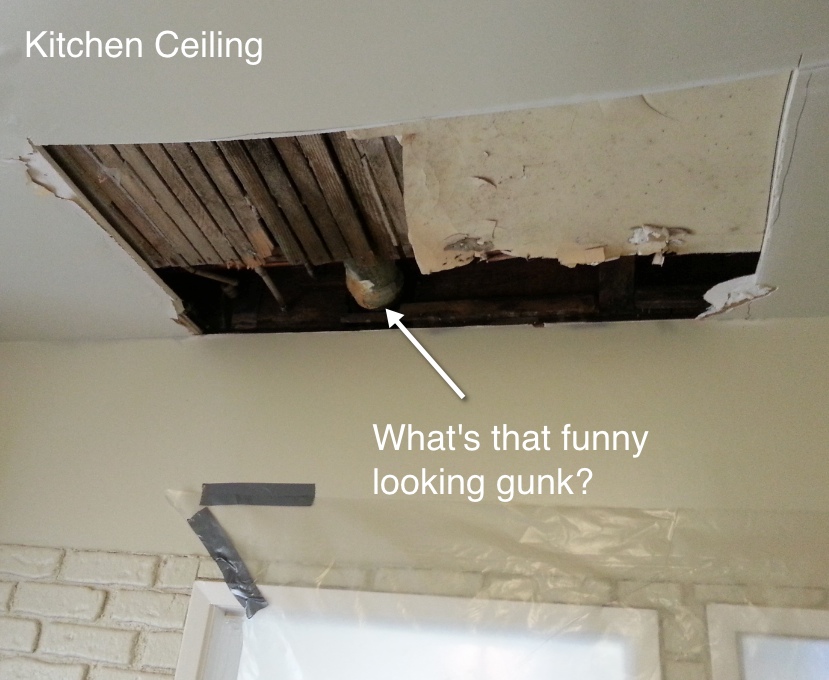
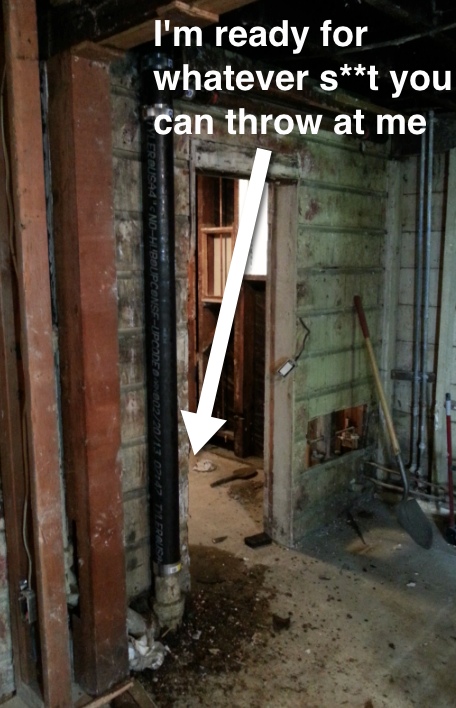
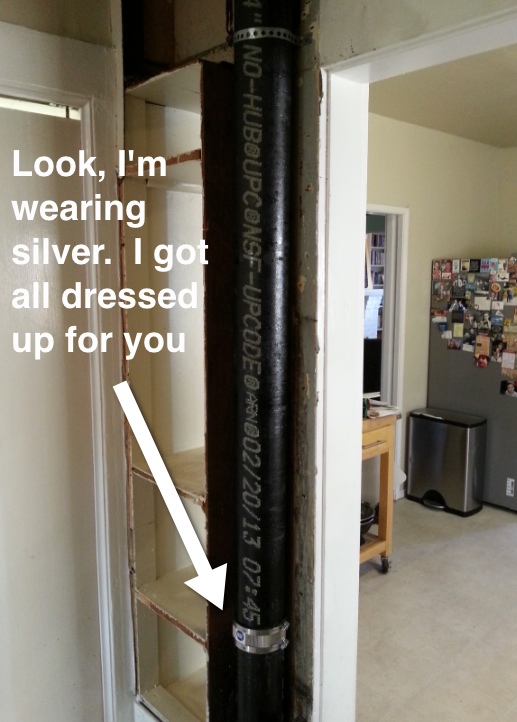
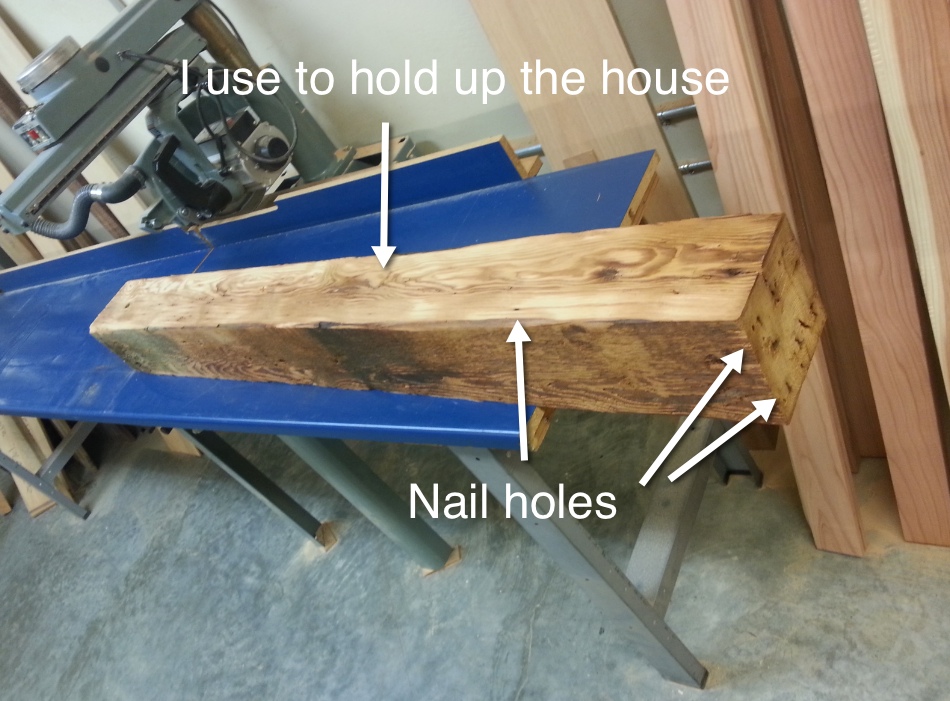
About a year ago we replaced a structurally unstable support column in the garage that is very similar to the one that still resides in the In Law unit:

twin

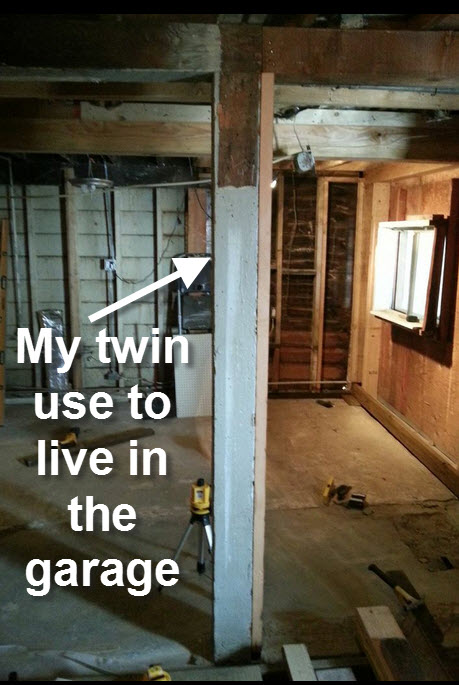
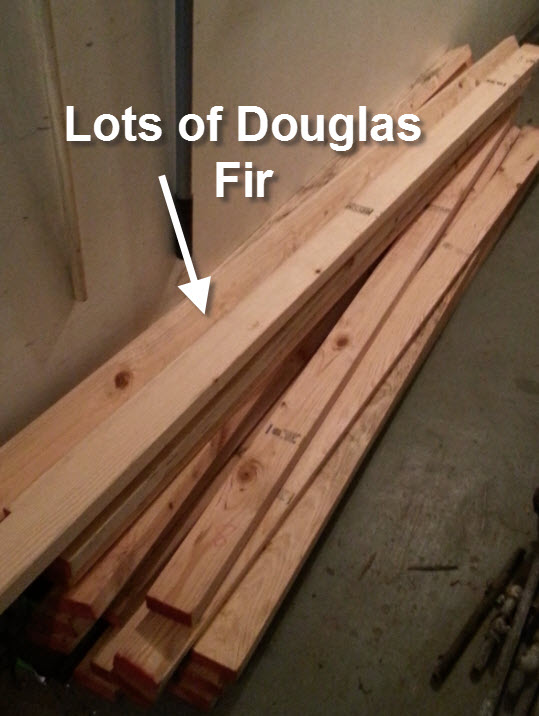
Rather than throw this beautiful piece of old growth Douglas Fir into the garbage, I took it into my wood working class.  There was something poetic about converting a historic piece of our house into something that could continue to be a part of our home.  With that in mind, we really needed a good coffee table for our livingroom, so I got to work.

Now, if you know anything about me, you know that I’m a planner.  I approach furniture building much like I approach DIY’ing.  If I just started hacking away at a piece of wood hoping to build a table I’d end up with a toothpick.  Therefore, the first step was to create the design using Google SketchUp:

design1

legs

apron

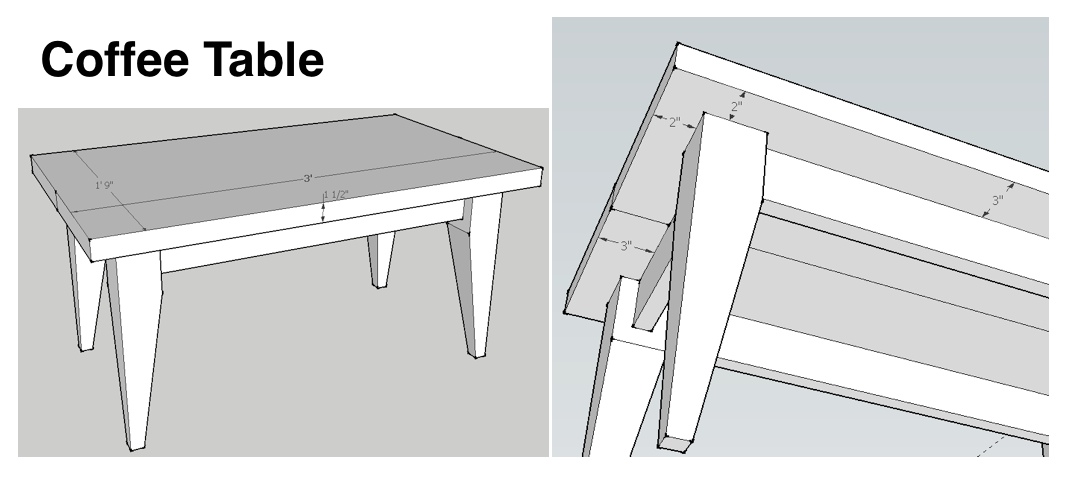
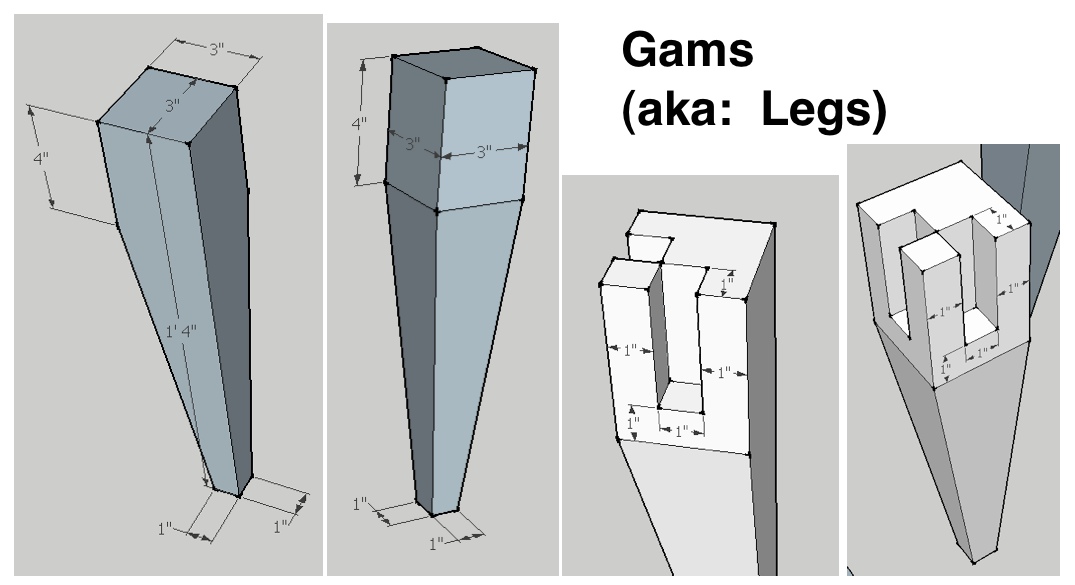
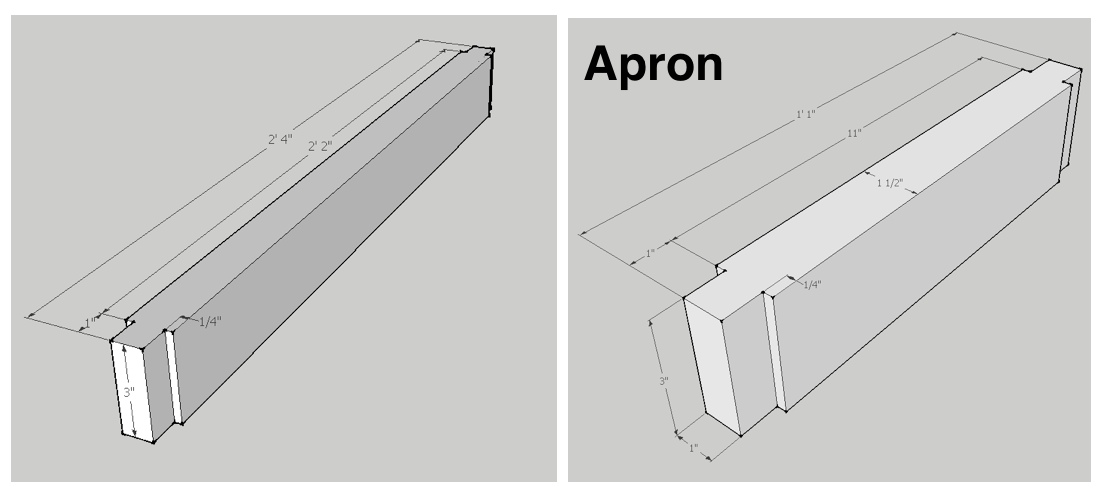
With the design in place, and the wood ready to be whittled down, it’s time to get this project started.  Here are some pictures of the transformation from structural column into reclaimed wood coffee table.

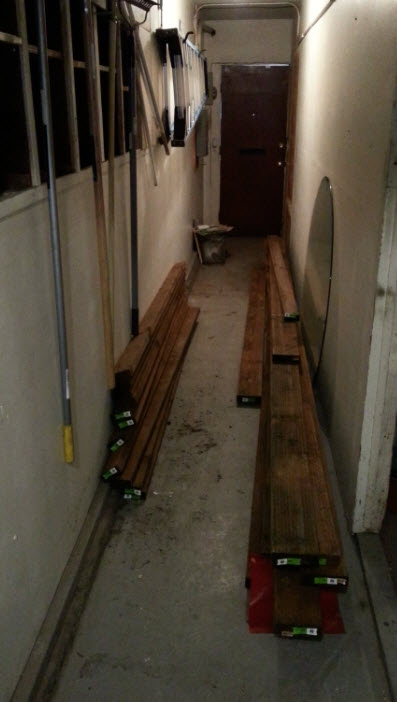
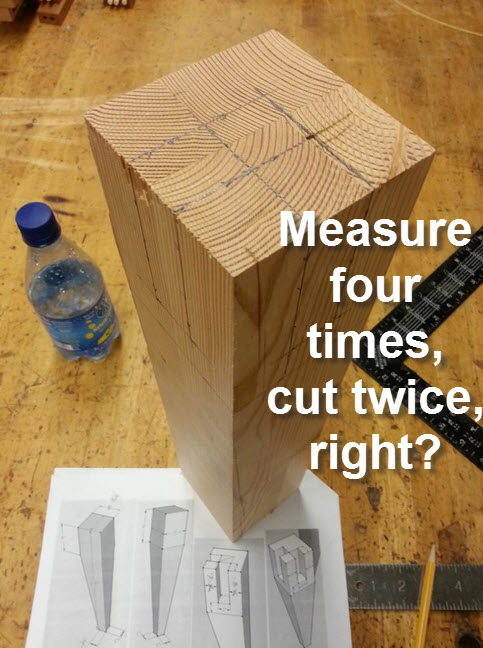
Here’s what I started with:

nail

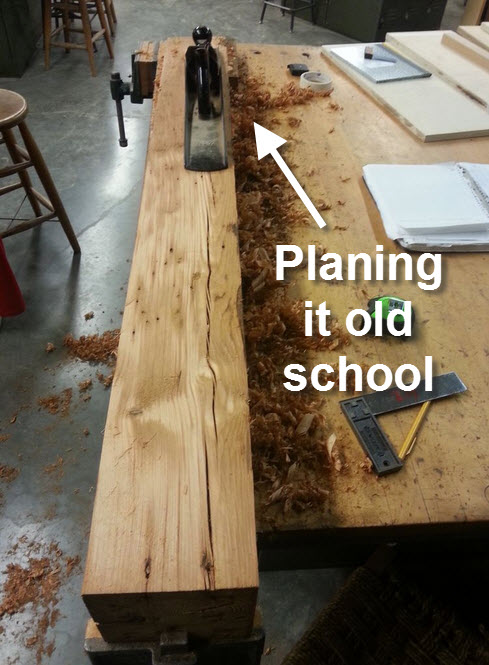
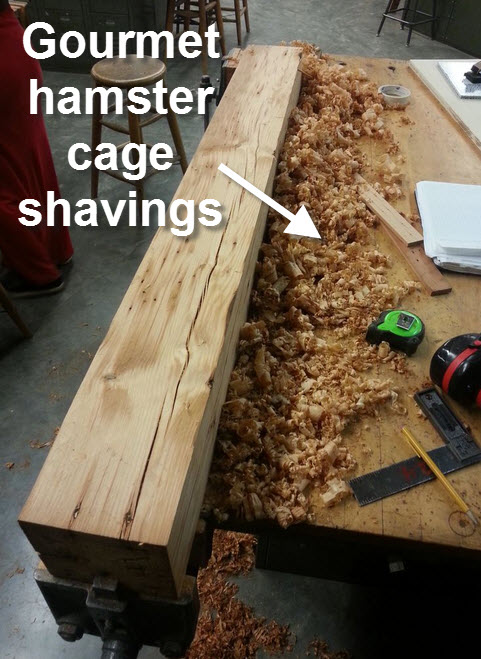
The first step was to make this small tree trunk as square as possible.  Unfortunately, reclaimed lumber tends to be littered with shrapnel from years of abuse.  You can’t run a piece of nail ridden wood through a mechanical planer or saw without risking damage to that machinery.  Therefore, I had to square this beauty up using a hand plane, old school style.

plan1   plane2

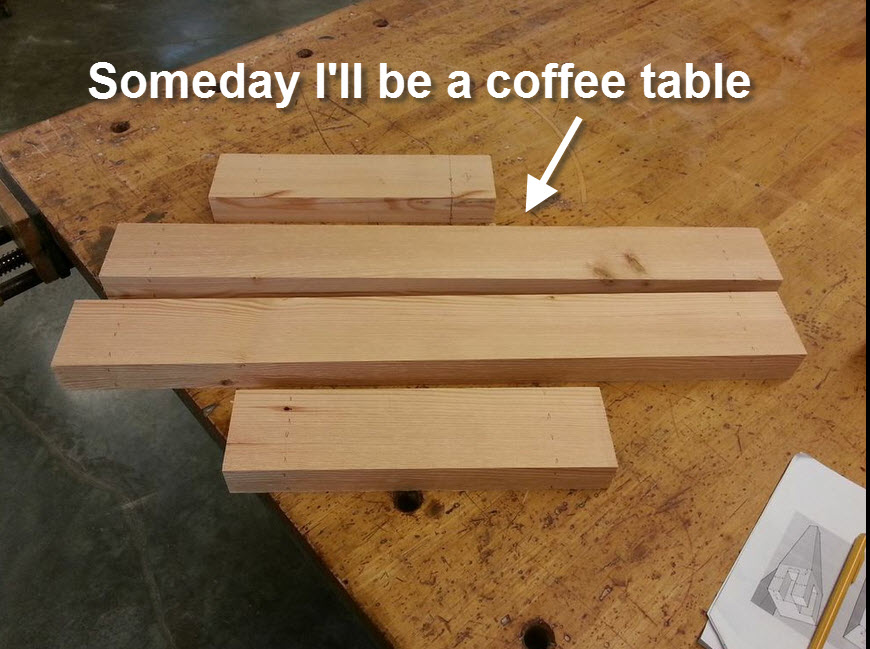
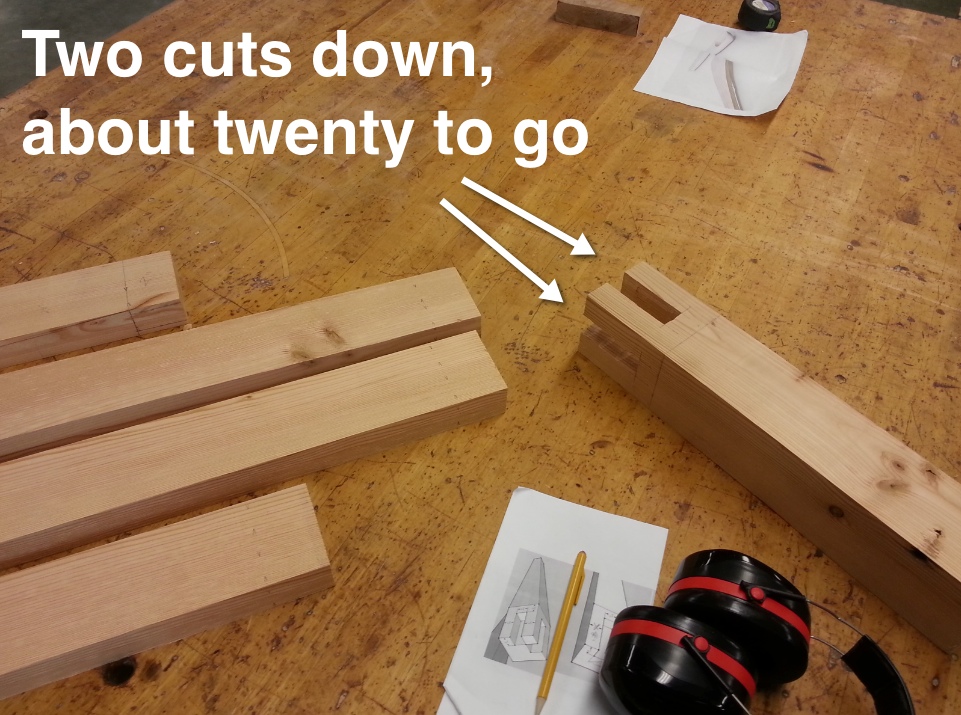
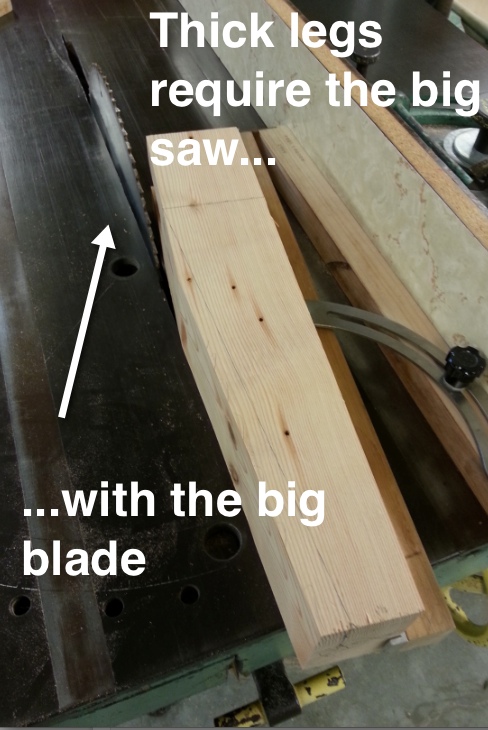
Once I finally got things square I was ready to cut them to size.  Since planing helped me identify both where the nails were and where my arm muscles were, I was able to take some pliers and pull out all the metal slivers that were scattered throughout the wood.  Once I was confident the wood was free of shrapnel, I could start using the machines to do the hard work.

legs2      legs

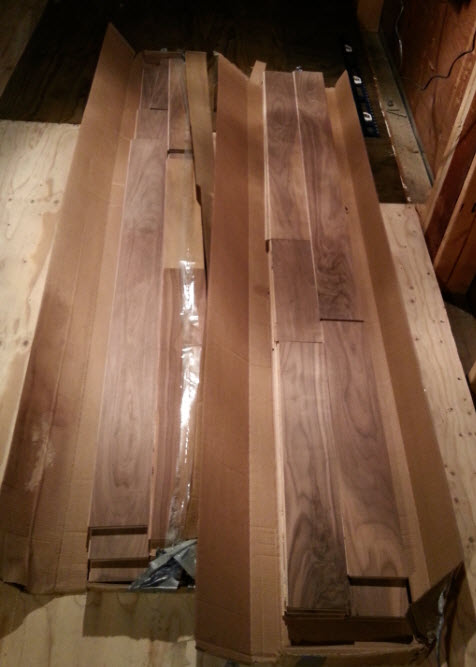
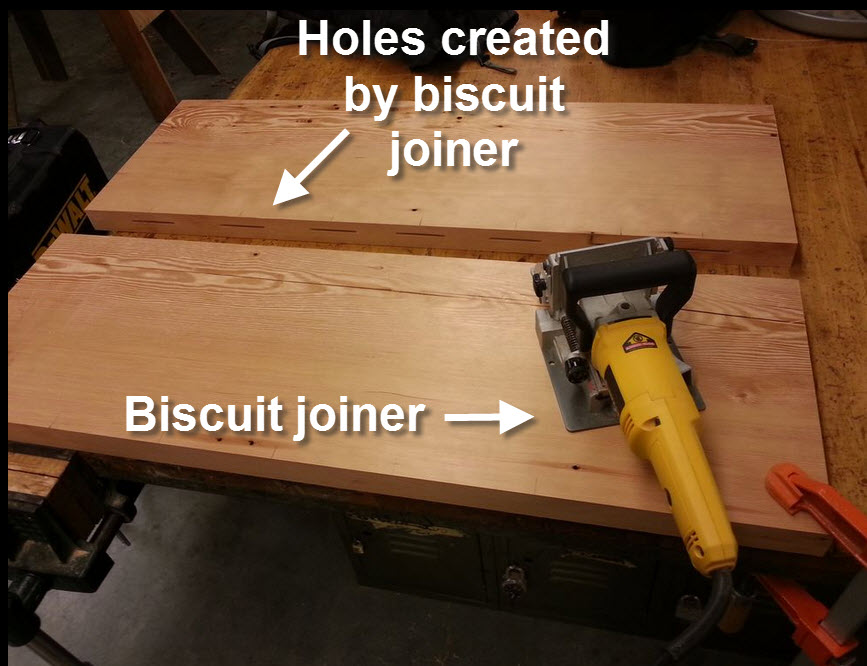
The table top is being built out of an old work bench that was in the garage.  The workbench was as old as the rest of the wood in the house, so I imagine it was “reclaimed” as a workbench by the previous owner.  As we know from the In Law unit, he too was a DIY’er.

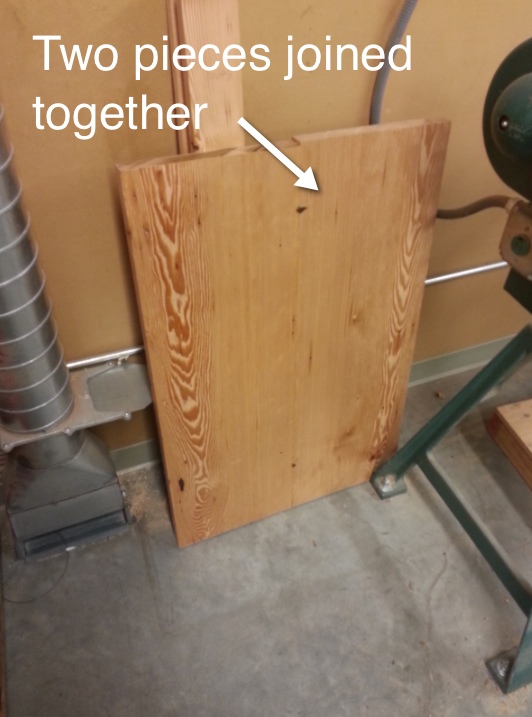
To create the tabletop, I took a Biscuit Joiner and ‘joined’ the two pieces together.

biscuit

tabletop

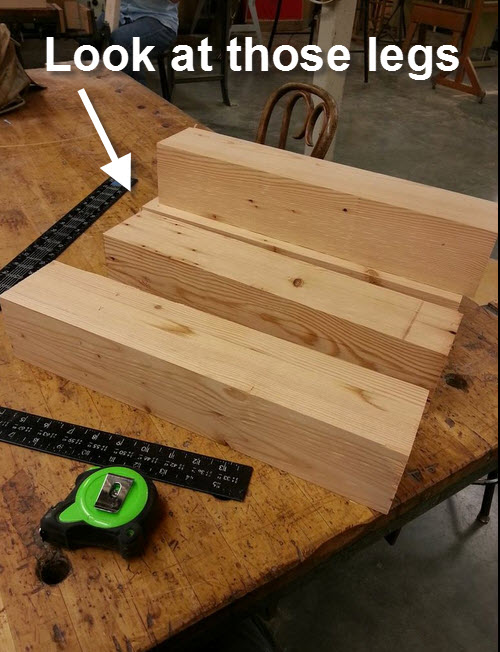
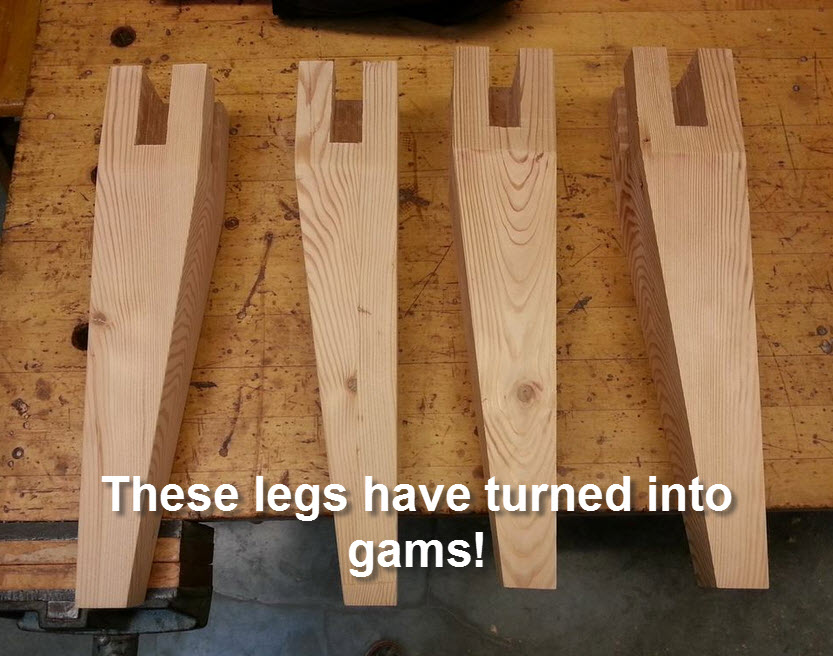
Now that everything is cut to size, I can start to fine tune these cubes & rectangles into a coffee table.

measure

two cuts

saw

legs.5

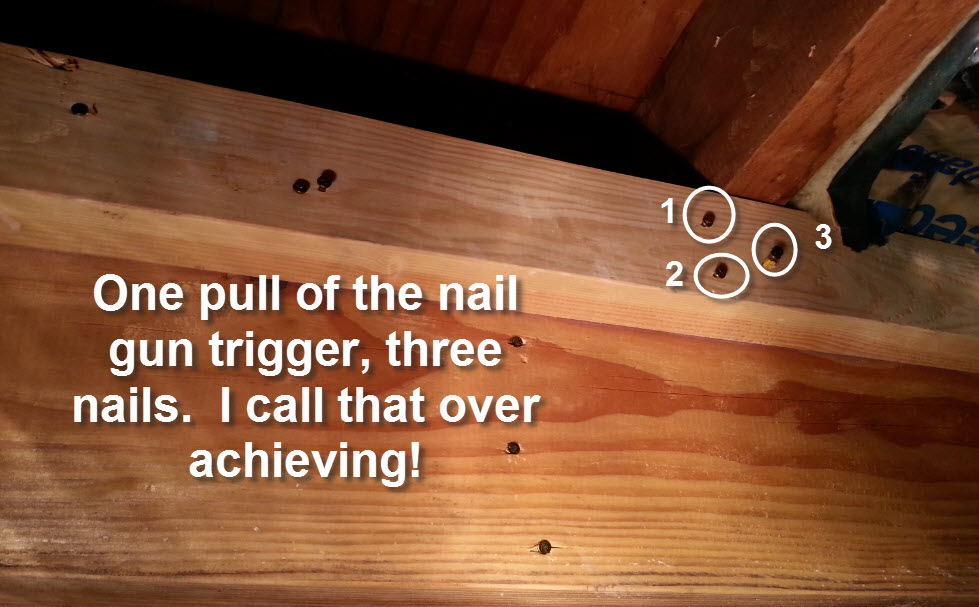
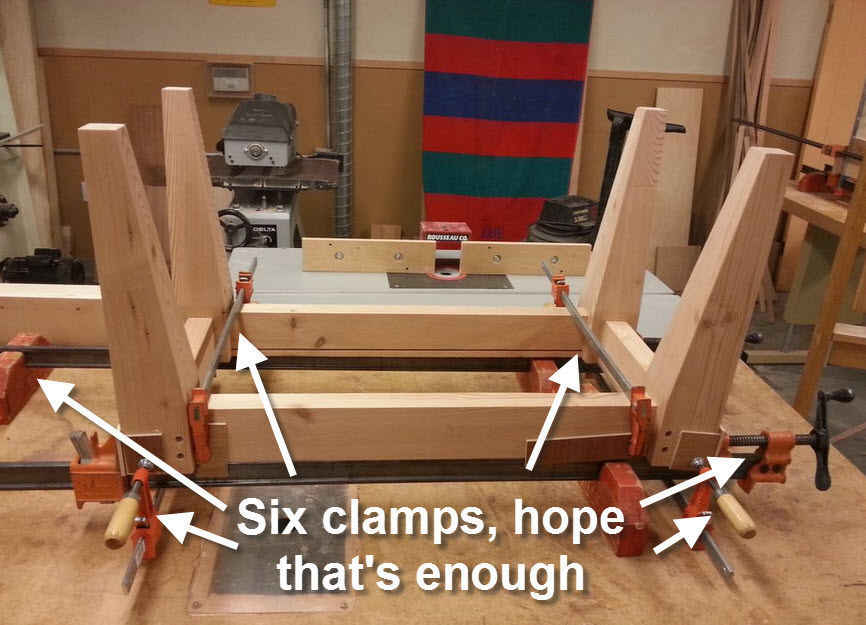
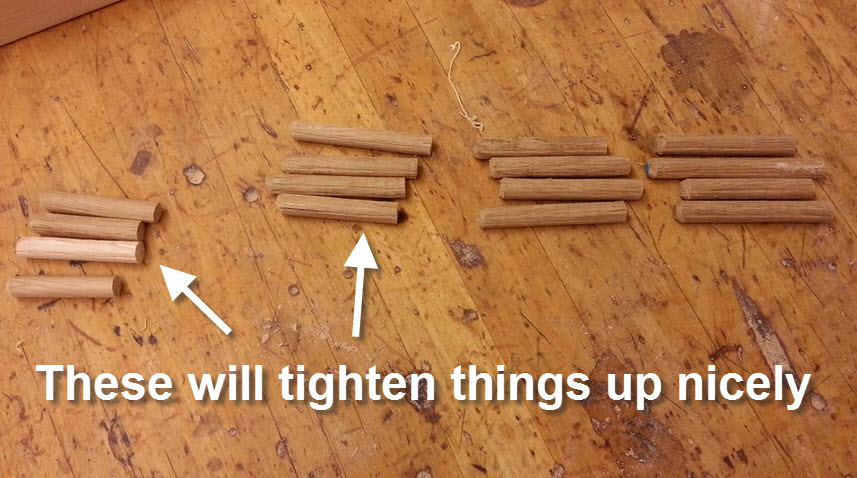
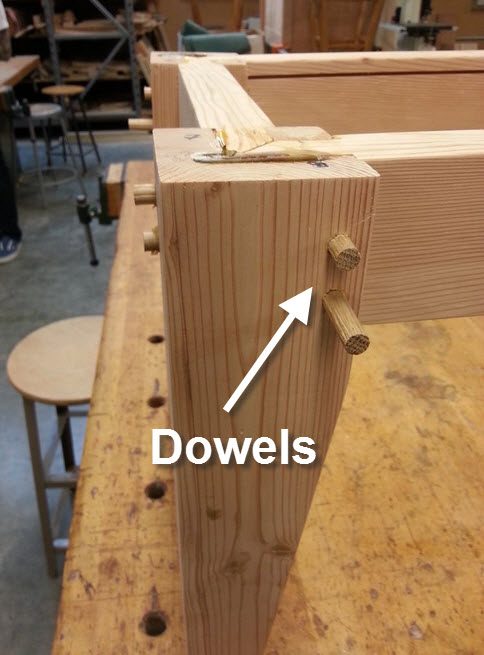
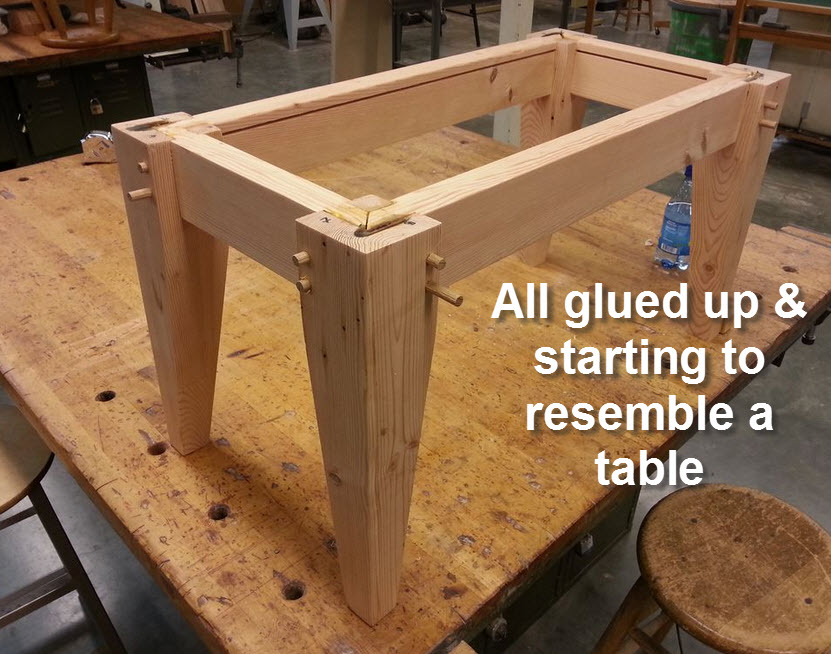
Now that all of my pieces have been nicely refined, it’s time to glue everything up.  Unlike my work in the In Law unit (where I shoot three nails for every pull of the nail gun trigger), when working on furniture I like to avoid using any metal.  Therefore, all of the pieces will be held together using wood dowels and glue.

clamps

pegs

dowels

table

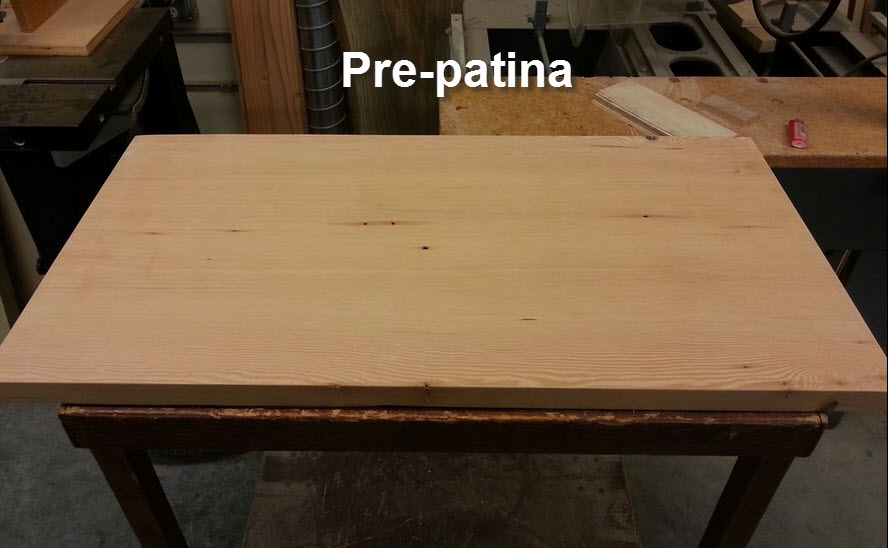
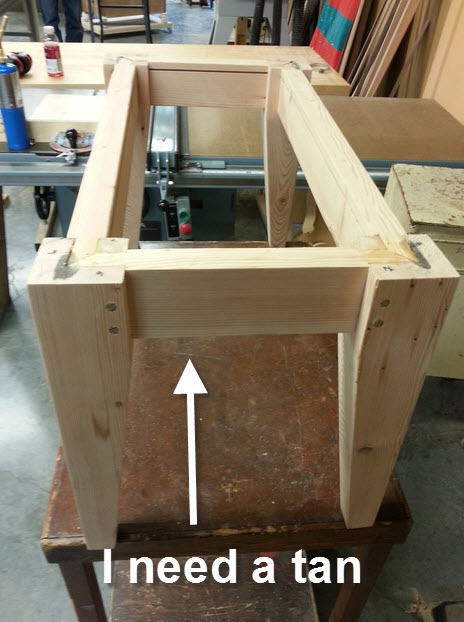
As you can see, between the cutting, planing and sanding, a lot of the beautiful old patina that makes reclaimed wood so special has been removed.  In an effort to recreate the look of aged wood I’m going to create a faux-patina.  How? You ask.  Well, using fire of course!

patina

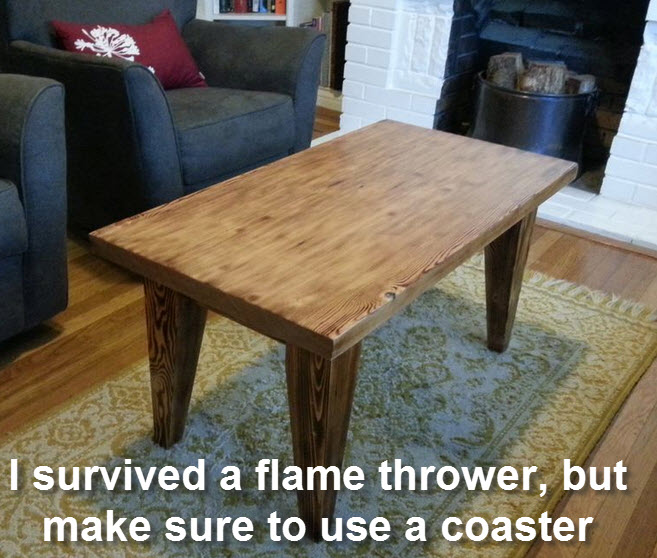
Burning wood can go horribly wrong, for both my project and my classroom.  However, after a bit of controlled flame-thrower action, we went from this…

patina3

tan

To this…

table

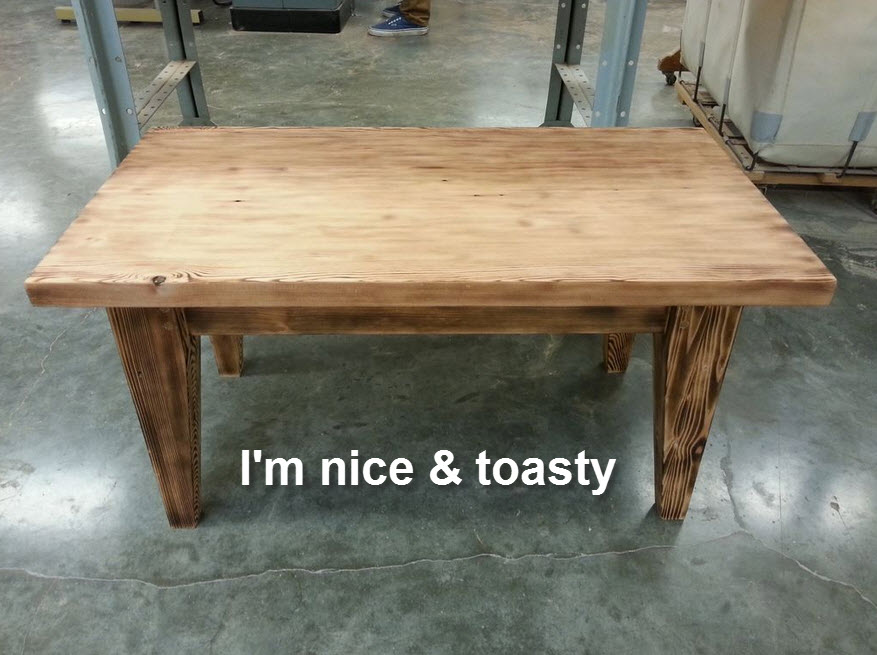
Finally I’m ready to apply the finish.  After consulting with my teacher, I’m going to coat the table in polyurethane.

home

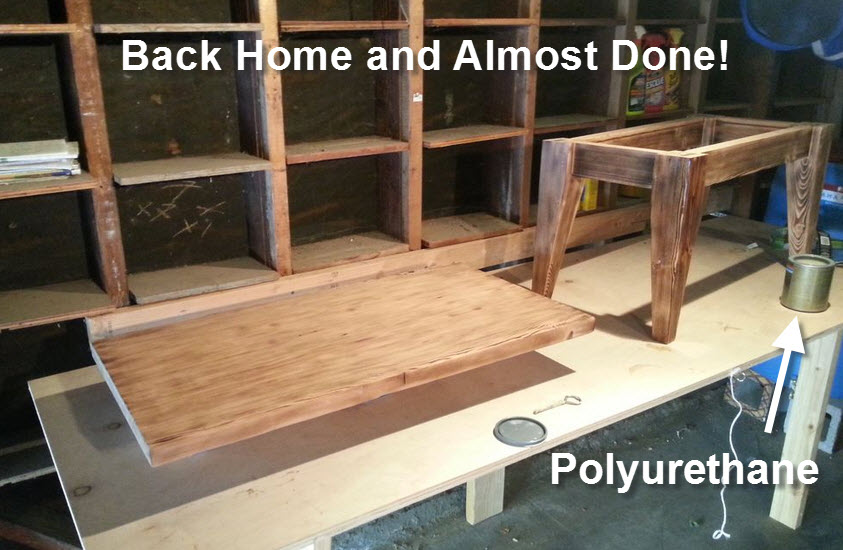
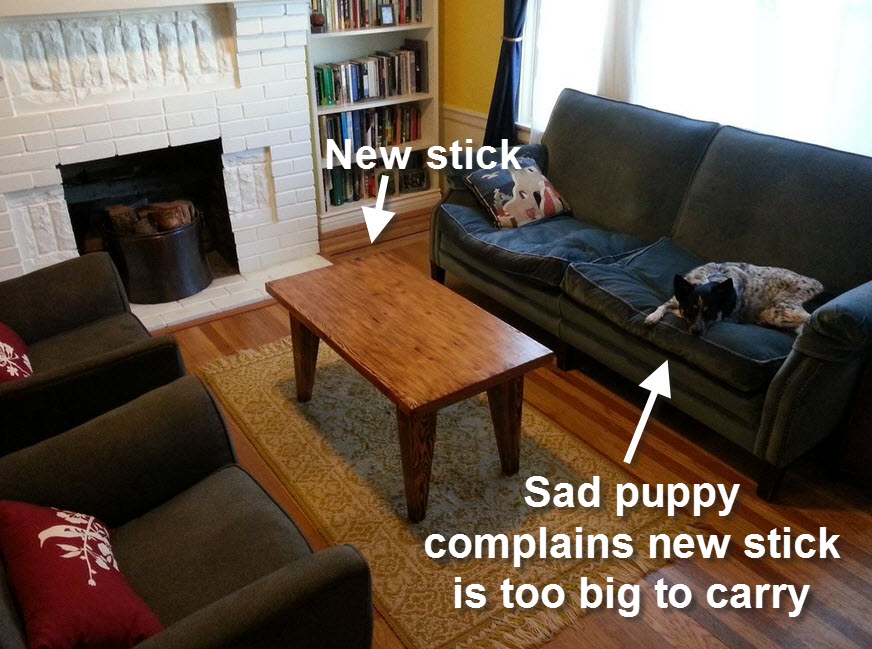
After a few coats, and some light buffing, here’s the final product:

Ta Da!

table2

table

Advertisement

In case you noticed a drop off of “Building With Beth” posts over the last week it’s because I’ve been on a luxuriously relaxing vacation.  Now don’t start thinking that I didn’t spend any time working on the In Law unit.  It was my vacation after all.  I had to take full advantage of my open afternoons and scheduling flexibility.  While the first half of my week was spent soaking up the sun and hiking the trails in the beautiful Santa Cruz mountains, the second half of the week was spent bringing a little light into the dim and dark In Law unit.

That’s right, it’s time to install some windows!  Well, one window and one sliding glass door to be specific.  The second window that needs to be installed was accidentally ordered in the wrong size, so that installation will be a different post.  Therefore, today we will be installing one new window and the sliding glass door.

The original windows were old, ugly and very energy inefficient.  Technically they kept out rogue mourning doves and roving bands of mosquitos, however, that was the limit of their functionality.  Here are a couple of pictures:

Window 1 – The Bathroom:  Technically the window in the bathroom is called a “Jalousie” Window, but I’m pretty sure that’s just a marketing ploy to make these ugly slatted glass windows sound fancier.

slatted

Window 2 – Future Sliding Glass Door:  This is a basic single-paned glass window, but someday it will be either a glorious sliding glass door, or a massive breach in the fortified walls of our castle.

sliding

Since I’ve never installed a window or a door before, I brought in a little help for this task.  There is something intimidating about cutting a hole into the side of your home and exposing the inside to nature and/or bandits.  Not to mention that the framing needs to be done properly or the window / door simply won’t fit.  To make sure this was done right, I brought in one of the guys who has helped me through this project, Simon.  

We began by reframing the spaces where the new window and the new door will be installed.  Since the space for the sliding glass door was already framed, we only need to cut the hole where we should be able to (in theory) simply pop the new door into place.  

side

Once the hole was cut we could stick down the waterproofing membrane.

obsolete

Once we finished cutting out the opening for the sliding door, we moved onto the bathroom window. The original window was tucked in between two studs, and was less than 12″ wide.  The new window will be nearly twice that size.  This meant that we had to add some new framing and expand the size of the original window opening.

bathroom2

I have to admit that the actual installation of the window & door was not nearly as complicated as I thought it would be.  In my mind I was opening a giant hole in the side of my home where waiting bands of robbers would come with their army of plague infested rodents and swarms of wasps to pillage my home.  I would be helplessly trying to keep them out by frantically working to assemble windows that came in a box of 1000 parts and needed to be put together using instructions that were both in a foreign language and in code

bandits

In the end, however, installation wasn’t nearly as intimidating as it was in my imagination.  Here are the really basic steps:

  1.  Frame out the space where the window will live.  Make sure that the new opening is 3/4″ wider and taller than the actual size of the windows/door that you ordered.
  2.  Install the waterproofing membrane in that opening.
  3.  Apply calking around the opening (on top of the water proofing membrane)
  4.  Pop the window into the hole & make sure it’s level by using a few shims
  5.  Screw the frame of the window to the wall
  6.  Enjoy your new window

Here’s the end result!

bathroom

garden

wasps

Now the real test will come when the reordered window arrives and I need to install it all by myself.   I’m pretty sure that I’m prepared for that challenge, but I’ll let you know how it goes!

Just when I thought I might be done working on my hands & knees, I was reminded that I still need to finish the bathroom floor.  I have grand dreams about what this bathroom will end up looking like.  It will have a tile shower & tub combo, recessed lighting, a nice big window and an open concept vanity with a drop-in sink.  It will be lovely, however, getting the bathroom from its current state to that finished product is a daunting prospect.  Especially considering my bathroom currently looks like this:

hole

As you may remember, when I first started looking into renovating the bathroom I discovered that none of the drains were vented.  Here’s a link to that post to refresh your memory:

The Science Of Water Drainage

In order to install the vent I needed to jack hammer the concrete in the bathroom to expose the plumbing.  What began as a little hole, slowly grew into a deep ravine.

small              bigger

biggest

Finally, after opening up the entire floor and having a plumber come in to make the necessary changes, I was left with lovely new plumbing sitting inside a giant chasm.  In order to build the subfloor in this room, I need to fill in this giant cavern with concrete.

Initially I though that working with concrete would be fun.  In my mind I had visions of playing in the sandbox as a child.  Enjoying the fresh spring air while meticulously building an elaborate fortified sand-castle.  The acropolis would defend against invading forces by enlisting the help of transformers who wouldn’t cower, even when faced with enemy GI Joe’s flying through the air on My Little Pony Pegasus’ like a synchronized fighter squadron.

pony

Unfortunately, the time sensitive nature of working with concrete did not lend itself to the unpredictable length of imaginary war.  

Before I could even get into pouring concrete, there were a few steps that needed to be completed. First, I had to wrap my new pipes in foam so when the concrete was finally poured and dried they would be protected.  The idea behind this step is that if the concrete were to shift, which it has been known to do in earthquake country, the pipes would have a little wiggle room.

floor5

I also decided to pour a light layer of sand into the crevice  and pound it down to make a somewhat firm base to hold the concrete.  Finally, I applied some concrete primer to the walls of the gorge to help the new concrete stick.

floor3

With that step complete, it was all about…you guessed it…material aquisition:

floor4

Now, in this picture you see 7 bags of concrete.  In the end, I severely underestimated my concrete needs.  After four visits to Lowes, I ended up purchasing 14 bags of concrete to fill my bathroom crater.  At 80lbs each, by the time this job was completed I felt like my arms were about to fall off.

Finally, it was time to pour the concrete.  I did this in two steps.  The first step was mostly about filing up as much of the hole as possible.   I was a lot less concerned about making things look neat & tidy during this initial concrete pour.

floor6

Once the first pour of concrete was dry I was able to start on the second layer.  The goal with this second concrete pouring was to level out the floor and make the final product look smooth & tidy.

floor7 floor8

Finally after 4 days, 14 bags of concrete and 2 very sore arms, I was done pouring the concrete.  Once this dries I can build the subfloor and we can get moving with making this bathroom the modern oasis that it is in my dreams.

Now that the In Law unit has a floor we can start addressing items that are at eye level. It’s a long way down to the ground when you’re as tall as I am, so the thought of working on tasks that don’t require kneeling on the ground is a very exciting prospect!  Also exciting is having a chance to practice my James Dean lean on a product of my making.

jd

That’s right, it’s time to build a wall!  Now originally I was concerned that building a wall would be like building a floor, but vertical.  I’m not going to say that building a floor wasn’t satisfying, but for all  you blog readers out there who are considering building a floor, here are a few things to remember:

1)  Floors are not at eye level.

2)  Gravity is not working with you.

3)  Building a floor involves lifting and moving very heavy and very long slabs of wood.  

4)  Nobody really says “wow, look at that awesome sub-floor,” except for people on this blog and I love you for it.

Here’s a picture of where the wall will be going:

wall

Now you might be saying “Beth, why would you build a wall where there is clearly a wall already built?”  That’s an excellent question blog reader.  You see, when we pulled all of the drywall down from this particular wall we found a living wall.  Not the good kind of living wall…

wall

…the kind of living wall that is made out of  mold.

stain

Part of our living wall was being fed by the moisture from the busted poop-pipe, and part of it was being fed by the moisture created due to a lack of insulation.  You see, this wall, which use to be part of the original house (hence the old siding), is separating the In Law unit from the garage.  The previous owner just slapped some drywall up onto the old siding and called it a day.

Eventually, hidden from the prying eyes of the public, behind the veil of drywall, the cold air from the garage started having a secrete rendezvous with the warm sultry air of the In Law unit.  The result of their romance was a living wall made up entirely of mold.

Now that their love children have finally been kicked out of the house, like any disgruntled step-parent I’d like to encourage them to explore the world & maybe get a job creating biofuels, but most importantly not move back home.

alge

To make sure they don’t move back in, I will be framing a wall over their former home (the siding) and will eventually fill that wall with closed cell spray foam.  The spray foam will both insulate and act as a moisture barrier between the cool garage and the warm In Law unit.

I began this task like all other tasks, with material acquisition:

wood

Once that was done I was able to start framing the wall.  Before kicking off this leg of the project I did quite a bit of research regarding how to frame a wall.  One set of videos I found really handy were from this guy:

Home Remodel Workshop

Based on what I learned online, I framed the wall every 16″, and tried to make sure the wood was all crowning the same direction.  Now, I know what you’re asking, “what is this lady talking about…crowning?”  Well, first of all, thanks for calling me a lady.  Second, every piece of wood has a bow or a crown.  That means it arcs in one direction.  If you don’t make sure all of the arcs go in the same direction, when you cover that framing in drywall you’ll have a wavy wall.   Maybe this illustration will help:

crown

With all of the crowns marked, I was able to get the wall framed pretty quickly.

newall

Once this was done, I was able to switch my attention to building a soffit around a few pipes that were attached to the wall.

drain

I’ve never built a soffit before, but how hard can it be?  After taking a lot of measurements to make sure I was building something square & level, this is what I ended up with:

drain2

drain3

I still need to frame out the wall under the new soffit but before doing that I need to make some adjustments to the bathroom door.

Overall, I think that building the wall over the weekend was quickest task so far in the “My First Renovation” project.  I’m either getting better at this DIY thing, or the hardest work is behind me.  Let’s hope both are true.

I am officially at a crossroads.  What do I work on next?  In all honesty, there is no shortage of work to complete, which might be part of the problem.  It’s sort of like being  a kid in a candy store.  While I want to eat tackle a bunch of candy tasks all at once, I’m afraid that after the sugar-rush thrill wears off I’m just going be an over indulgent DIY’er laying on the ground with a stomach ache.   To avoid this sugar coma I’ve decided to narrow my focus down to one task.  Wall framing.

Much like the floor, framing a wall sounds easy in theory, but I have a feeling it will be much more complex when I really sink my teeth into it.  On a positive note, I think we’ve come to a decision on how the wall will look down the line.  Here’s what we’re working with right now:

future

Now you might remember in one of my earlier posts that I discussed the idea of installing a sliding barn-door in front of the closet.  In case you need to refresh your memory, here’s a link to that post:

The Hassle of Doors

The plan is still to cover the closet with a sliding barn door, however, the plan has evolved a bit since I last posted about it.  Rather than building a wall, covering it in drywall and calling it a day, the new plan is to take the extra step to cover that wall in wood paneling.

Here are a few pictures of different paneling options that I like:

wall1


wall3


wall4

wall2

To aid me in my quest for wood paneling, I decided to call upon the discarded and disheveled masses.  The cast aways.  Those that once had homes, but find themselves sitting patiently as they wait for that one special person who will see the beauty they possess inside, underneath the years of neglect and grime.

That’s right!  It’s salvage yard time!  

Normally the salvage yard visits are more for brainstorming ideas and are less about actually finding quality merchandise; however, this weekend was different.  Leaning against a wall like a tall dark stranger, beckoning me with a bewitching glance, were two unopened boxes of unfinished walnut flooring.  I was torn.  Should I listen to my head that’s telling me to ‘stay away’ lest I be disappointed to find that underneath that dark and alluring veneer is a weathered and worn interior that has seen better days, or should I listen to my heart that says ‘go for it!’  I mean, we all have parts of us that are weathered and worn.  For me, it’s my drilling hand, so why be so quick to judge?  

In the end, my heart won out and I went home as giddy as a school girl with these beauties:

walnut  walnut2

Now, in reality two boxes only amount to a space of about 6 feet by 8 feet.  With that said, I’m sure I can find some more walnut flooring to match, or I could even mix and match this wood with some other wood to come up with a cool look.

Either way, listening to my heart was the way to go.  I couldn’t be happier with the new additions to the household and I can’t wait to see them up on the wall!

Next up…building a wall!

I know what you’re thinking…”finally, the end of the floor building saga!”  (Okay, maybe that’s what I’m thinking).  Either way, we’re correct!  It’s true!  This is the last post on building a sub-floor.  I’m sure there will be other posts about laying hardwood, but let’s not get ahead of ourselves.  

For those of you just joining us, feel free to catch up by checking out the last two posts on building a floor:

Building A Floor, Part 1

Building A Floor, Part 2

Originally I was planning on splitting the room into two and building half of the floor now and the other half at a later (to be determined) date.  Some call the process of tackling a large project in smaller, more manageable, bites good project management.  What those jokers clearly aren’t considering is that I am a procrastinator.  I enjoy challenging the laws of physics by stacking my dishes into a Jenga-like tower rather than washing them.

dishes

Therefore, in an effort to keep this project from stretching into my golden years, I’ve decided to dump my previous approach and get this monstrosity of a floor finished.

Since I’ve already discussed the process of installing joists & headers in my earlier posts, I’ll give you a summary of that effort on the 2nd half of the room in picture form:

Installing The Rest Of The Joists:

To ensure that the entire room has a level floor, the new Joist Headers needed to be installed at the same height as the previously installed headers.  This is the perfect opportunity to utilize Jetson’s level modern technology.  The laser level!  With one flip of a switch, I was able to shoot a laser-beam around the room and measure off of that level line.

laser

Nothing can take away the joy of using laser-beams.  Even the process of installing a level Joist Header beside a recently replaced poop-pipe and ancient gas line that juts out of the wall.

wall

joist1

Unfortunately, the floor is covered in bumps and humps and other uneven things that need to be built around.  This required a little hacking of the joists to make them lay level.

beaver

Finally, the joists are built and are ready for some plywood!

joists

Step 7 – Get Some Plywood:

I decided to use a  mixture of pressure treated and regular plywood.  I’m going to put the pressure treated plywood along the walls and anywhere there is a risk of moisture.  Since pressure treated plywood is a little more expensive and isn’t needed on the whole room, the rest of the space will use regular plywood.

All of the plywood is tongue & groove, so it should fit together tightly.

tongue

In theory, the tongue should fit snuggly into the groove.  In reality, you have to MAKE the tongue fit into the groove by summoning all of your physical, mental and emotional strength.

After purging yourself of that strength, you will then find the clarity of mind to either cut the tongue off in a swift and satisfyingly decisive whack with a circular saw, or you will take my approach, which was to use a small hand plane to smooth out the tongue so it will slide into the groove effortlessly.

Step 8 – Marking Joists:

Before we move onto laying the plywood we need to mark the joists.  By marking where the joists are, you’ll have a much easier time screwing the plywood into the floor.  Being the techo-geek that I am, I like to use the latest in modern technology to mark my floor joists…the Sharpee and Chalk Line:

chalk

Then I just take my chalk line and stretch it from the joist marking to the end of the plywood.  When I get to the point where I’m gluing the plywood down, I’ll I need to do is place screws on that chalk line.

Step 8 – Screwing & Gluing:

Next step, screwing & gluing! That’s exactly what we’re going to do with that plywood.  The plywood is glued to the joists to reduce squeaking, and is then screwed into place to reduce movement.

To prep for the screwing & gluing process, I find it easier to lay things out to make sure the pieces will fit where you expect them to.  In some cases you will need to cut the plywood around obstacles:

plywood

Then I lay the plywood down so that the seams are staggered (like when you lay brick).  This will reduce the possibility of them moving along a seam and causing problems down the line with the future hardwood floor.

staggered

Then, in a whirlwind of a week you get a FINISHED FLOOR!

Step 9 – Enjoy Your New Sub-Floor!

Floor1

south

Room1

Ta Da!  A new floor, ready for dance parties and musical reenactments.  I have already certified that one can channel Julie Andrews, and spin wildly in a circle, arms outstretched in joy!  What more does one need from a new floor?

julie


After working on this project over the last month as a lone DIY’er, last week I became a DIO’er (Do It Ourselves’er).  That’s right, I opened up the In Law unit to my contractor’s team!  This was a very exciting step for me.  While I want to be able to utilize my skills to do this entire project, the reality is that there are certain things that I need help with.  Such as, lifting a few-hundred pound support beam into place without snapping myself in half, or repairing a ceiling that is being held up by magic when I can’t even corral animals to do my bidding.  For these little jobs I like to call in reinforcements!

With that said, this is “My First Renovation” and I didn’t want to simply hand over the keys and lay in the hammock all afternoon (although that does sound lovely).   No!  I needed to be in the mix!  Hand me that nail gun and I’ll shoot far too many nails into that piece of wood (on purpose of course!).  

nailgun

Throw me that circular saw and I’ll cut through that plank at least a two or three times before realizing you wanted that other plank cut!  I’m ready!

What I’m trying to say is that I decided to stick around and help the guys while learning a few things in the process.  The whole experience was really satisfying!  Not only did I learn a ton (like, did you know that you can use the sawzall to saw through nails?  If only I knew that during demolition), but I also got to see exactly what was happening with the In Law unit.  I know the quality of work that was completed and I can tell you exactly what changes were made.  This is very nurturing of my OCD (Obsessive Compulsive) side.

One of the things I love about some blogs are Before & After pictures.  Here are a few for you to enjoy!

 BEFORE:

troublezone extra

AFTER:

support

support

BEFORE:

magic

AFTER:

ceiling

BEFORE:

slope

AFTER:

garden

BEFORE:

sandwich

AFTER:

sandwich

AFTER the AFTER

Hammock time!  Where’s my blended fruity drink?

hammock1

Wow, what a week!  In between cleaning up residual poop-pipe debris,  hosting a baby shower, babysitting and working my day job, I was able to squeeze in some work on the new floor.  It’s not completely done but I figured I’d at least give you an update.

Unlike my magical thinking would dictate I was unable to rally the local wildlife to help me complete this work.  Frankly, in the end it is probably for the best since getting local wildlife to leave is typically harder than getting them to stay.

disney

Last time I posted, we were finishing up with Step 3 – Site Preparation.  Well, with the site fully prepped and covered with the moisture barrier we’re now officially onto construction.

Since I don’t want to overwhelm you with too much geek-speak, I’ll start out by explaining the basic concept of what I’m trying to do.  In order to navigate around the sloping and uneven concrete foundation, I’m going to build a floor that “floats” above the concrete.  The idea is that I’ll install what they call “joist headers” at each end of the room, and then install floor joists to those headers.    

float

The floor joists will hover above the uneven concrete, thus (in theory) creating a level floor.  

Now, onto building!

Step 4 – Installing a Joist Header:

The first thing I did was attach two 2×6 Joist Headers to the wall studs on each side of the room.  It was really important that the joist headers were as plumb and level as possible since the floor joists were going to be attached to those headers.  

If the headers aren’t level (one side is higher than the other) or aren’t plumb (they are not installed straight up and down vertically) the floor will slope.

joist

Joist2

Once the Headers are installed on the two sides of the room, then it’s just about attaching the joists.  Sounds easy enough, right?  

Step 5 – Installing Floor Joists:

First thing you I did was purchase joist hangers.  The joist hangers are sort of the construction world’s strapless bra (for all you ladies out there).  Think of them as the over the shoulder header bolder joist holder hanger.

joist

You can get these joist bras hangers at most hardware stores, and they usually display what size of wood they best accommodate.  Since I’m working with 2×6’s, I purchased hangers that fit that size.

Next, I used the joist hangers (i.e.:  the bras) to hold the floor joists, which stretch the length of the room, to the hangers.  Since that is a lot of “joists” for one sentence, here’s a picture that might help explain what I’m talking about.

diagram

I installed the floor joists so that they were level with the header.  That way, when I finally get to installing the plywood it should rest evenly on top.


hanger

Each time I installed a floor joist I also had to make sure it was level with all of the other joists I had already installed.  Having a long (72″) level made that much easier.

joists3

Step 6 – Adding Support:

While 2×6’s are really strong, I didn’t want the floor to feel “squishy” or to sag since there is just air between the moisture barrier and the bottom of the joist.  To try to reduce the risk of a squishy floor, I took two extra steps.    

First, on the end of the room where the concrete sloping was lower, I screwed 2×4’s to the bottom of the floor joists.  This gave the joists a little more support since otherwise there would just be air underneath.

Second, I installed “nogging,” which are additional supports that go between the floor joists.

nogging

I installed the nogging so they are just slightly lower than the floor joists.  That way when I lay the plywood on top, it will actually rest on the joists and not on the nogging.

nogging2

With this extra support, the floor feels really solid!

In the next installment of Building a Floor, I’ll be laying the plywood.  That’s the fun part!!

I suppose that when you end your most recent post with “we will see what surprises are in store for me over the next few days,” you’re almost asking the universe to surprise you with something special.  While I‘m going to try to not read too far into this, the universe has decided to surprise me with a foot and a half long crack in our home’s sewage line.  

After opening up the walls in the In Law unit a couple of weeks ago, we found some pretty major water damage, along with clear signs of an ongoing leak.

floor

My rough guess is that the leak has been happening for around 20 years.  I mean, it takes awhile to disintegrate over a foot of wood.  Needless to say, it was finally time to find the culprit.

After putting on my sleuth hat, I took the day off of work and met the plumber so we could investigate the source of the leak.  Naively, the lack of foul odor led me to believe the leak was coming from a water line.  Well, I’m not sure what’s wrong with my sense of smell, but as it turns out we found not one…not two…but three cracks in our sewage pipes.  

There was, of course, the afore-mentioned foot and a half long crack.  

sewage line  crack

Then there was a hole on the toilet flashing (which connects the toilet to the sewage line) that had been DIY-fixed with some sort of putty.  

kitchen

poop1

And finally, there was another hole on the opposite side of the flashing that had not been DIY-fixed.

poop2

Now I’m not trying to ‘diss’ DIY home repair.  I mean, I’m a DIY’er and I have the magic of the inter-web at my fingertips.  Imagine in the days of yore, when indoor plumbing was a new-fangled luxury and plumbers were just former stable-hands that were trying to get in on the crazy pooping indoors fad.  It must have been a lot harder to become a properly educated DIY’er.  With that said, purely from a chemistry standpoint, some materials are more porous than others.  I’m no chemist, but my guess is that drywall putty is on the more porous spectrum, therefore, not being the best choice when trying to fix a leak.

With all that aside, there are some positive, and some negative, things that have come out of this experience.

On the negative side of things, our poop-pipe was leaking (for 20 years), resulting in some significant dry-rot in the In Law unit.    This realization meant we had to remove the pipe.  Removing a pipe of this nature is not only difficult, but also a bit gross.

sewage      empty

The positive side to this whole thing, however, is two-fold.

First, we have a brand new poop pipe that stretches the entire length of the house.

new

It’s almost a shame to cover it back up with drywall, but I don’t think that visitors will get as much joy as I do looking at this leak-free pipe.

pretty       silver

Second, I was able to spend a lot of the day working on the floor in the In Law unit while the plumber worked his magic in the house.  I made some significant progress, however, it’s not quite done.  For this reason I’m going to wait to share it when there is a finished product.  After all, I want it to be a surprise.  Just to be clear, the GOOD kind of surprise.

I’ve finally moved past the planning phase and onto the floor building phase.  Well, at least half of the floor building.  I’ve decided to split the room, and thus the effort, into two phases.  The main reason for this is because the two halves of the room are significantly different, both in elevation and in their level of disrepair.

The Northern part of the room is newer construction that is in pretty good shape, however, the floor is significantly lower than the rest of the room:

floor

The Southern side of the room needs some pretty major repair work.  I’m bringing in my contractor to help me move one of the structural columns, as well as shore up the ceiling where we found the old (and rotting) deck.  In order to have plenty of room to do that work, I’ll be holding off on building the floor on that side of the room for at least a couple of weeks.

south

For now, I’ll be focusing my efforts on building the floor on the Northern side of the room.  As you may recall in my last post, I was taking some time off to let my back heal and to come up with a fool-proof attack plan!  Of course, in my mind that plan included huge pieces of wood magically appearing in the work space, cut to the proper length and ready to snap into place in a perfectly level and plum grid.

(I just want to say that I blame Ikea, and Disney movies for my magical thinking)

As it turns out, adorable little birds are too small to carry such heavy wood. Therefore, we will have to take the task of building a floor step by step.  

Step 1, the Plan:

You can refresh your memory by checking out the plan in my last post by clicking here

Step 2, Acquisition Of Materials:

I’m lucky in that San Francisco has a number of locations to purchase lumber;  therefore, I’m never further than a few blocks away from a lumber yard.  With that said, getting the wood home was still quite the task.  I would have loved to have taken a self-portrait of myself, lifting the massive amounts of wood onto my car in full She-ra mode, but in the end it was simply too hard to juggle the camera.  

shera

Despite my lack of physical evidence, I was able to lift the wood onto the car, and drive it home.  

car

From the car, to the hallway…and done! (well, not quite)

wood

Step 3, Site Preparation:

The In Law unit floor was not only dirty, but also had some major cracks/holes in the concrete.  I’m pretty sure at least one of those holes was Ricky’s front door, which only moderately freaked me out.   I’m sure the trauma of having a zombie rat fly from the rafters at my face will wear off in no time.

I decided that rather than just building on top of the cracked concrete, I would go ahead and take the extra steps to fill in those holes.  I first vacuumed and cleaned the space and then applied a concrete bonding agent.  The bonding agent acts like a glue for the concrete.  Without it, the concrete would have a hard time sticking to the other concrete in the space.

riky

Once the bonding agent was dry I was able to mix the concrete and fill the holes.

concrete

I gave the concrete 24 hours to dry, but I’m pretty sure it was the fast setting kind so it would have been ready in just about 3 or 4 hours.

Once it was dry I spread out a sheet of 6 mil plastic moisture barrier that I will be building on top of.  While pressure treated wood should be able to be placed directly on top of concrete without a problem, since this space has been known to have moisture issues I’m taking a few extra steps to try to keep the space dry.

rat

To keep the plastic from sliding around I stapled it to the walls.  Eventually, I will be taping the plastic to a moisture barrier that I will stretch across the wall, creating a sealed (water-resistant) enclosure.  I know it may be hard to picture, but I’ll explain that more when we get to that stage of the project.

Step 4 – Building

Now that the materials are purchased, the floor is clean, the holes are filled, and the concrete is covered with plastic, I can start building.  Unfortunately, those first few steps took pretty much all weekend.  Please stay tuned for Part 2 on building a floor!  Assuming things go as planned, that should be completed this weekend.

With that said, so far things have not gone as planned, so we will see what surprises are in store for me over the next few days.