Building A Floor, Part 2
Wow, what a week! In between cleaning up residual poop-pipe debris, hosting a baby shower, babysitting and working my day job, I was able to squeeze in some work on the new floor. It’s not completely done but I figured I’d at least give you an update.
Unlike my magical thinking would dictate I was unable to rally the local wildlife to help me complete this work. Frankly, in the end it is probably for the best since getting local wildlife to leave is typically harder than getting them to stay.

Last time I posted, we were finishing up with Step 3 – Site Preparation. Well, with the site fully prepped and covered with the moisture barrier we’re now officially onto construction.
Since I don’t want to overwhelm you with too much geek-speak, I’ll start out by explaining the basic concept of what I’m trying to do. In order to navigate around the sloping and uneven concrete foundation, I’m going to build a floor that “floats” above the concrete. The idea is that I’ll install what they call “joist headers” at each end of the room, and then install floor joists to those headers.
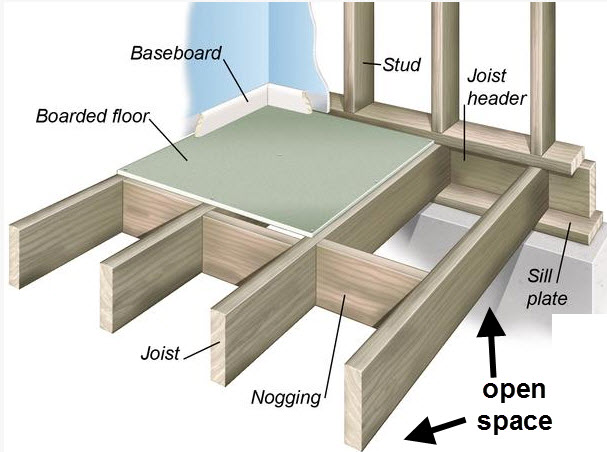
The floor joists will hover above the uneven concrete, thus (in theory) creating a level floor.
Now, onto building!
Step 4 – Installing a Joist Header:
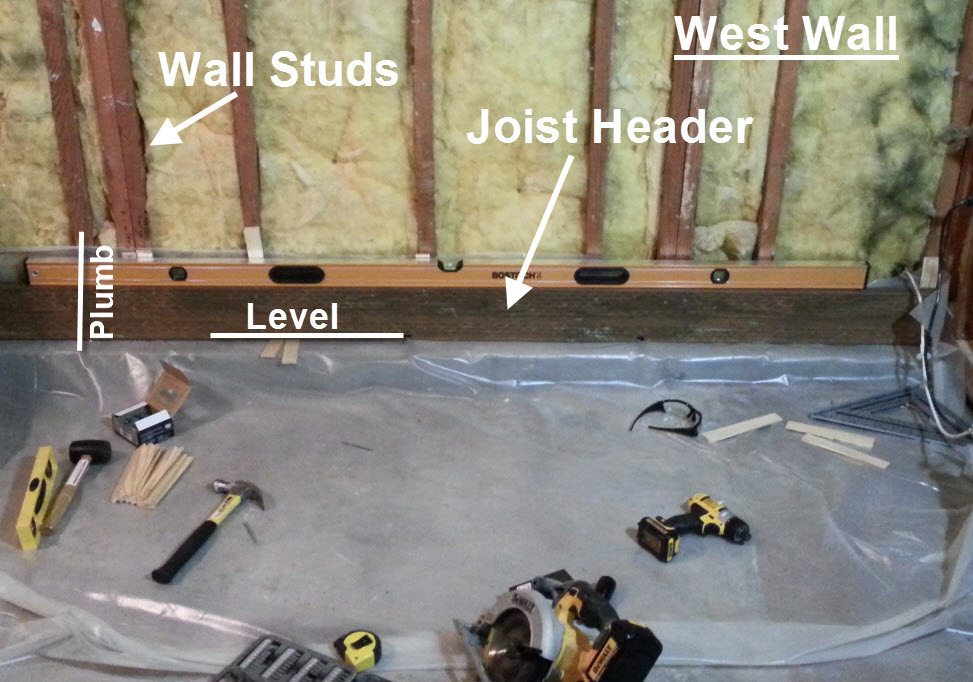
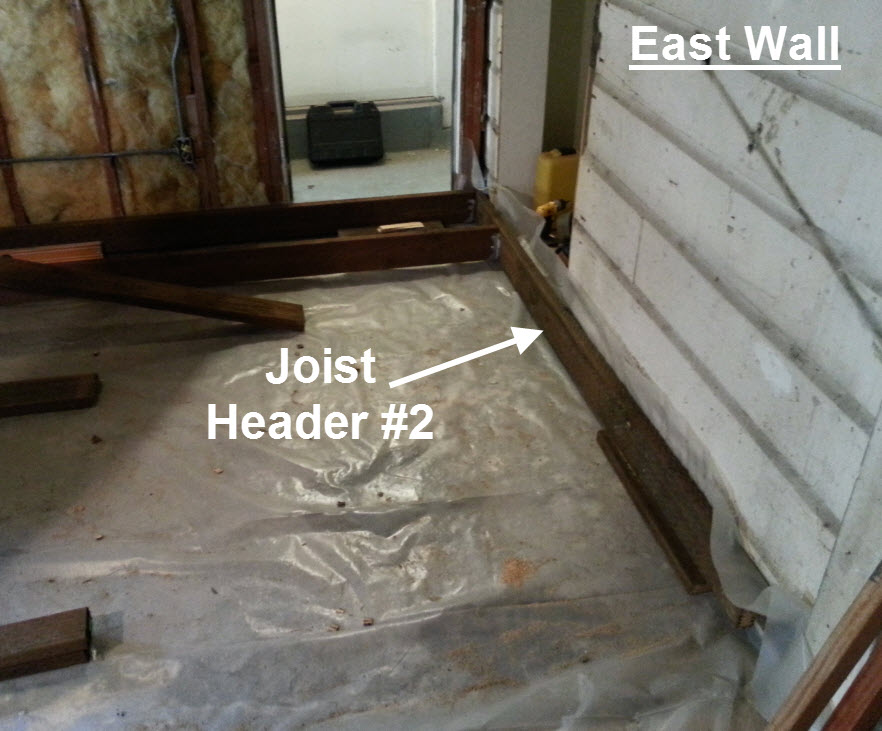
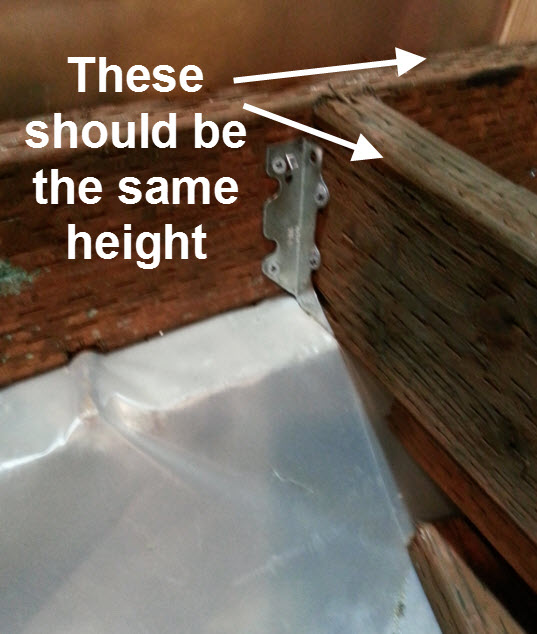
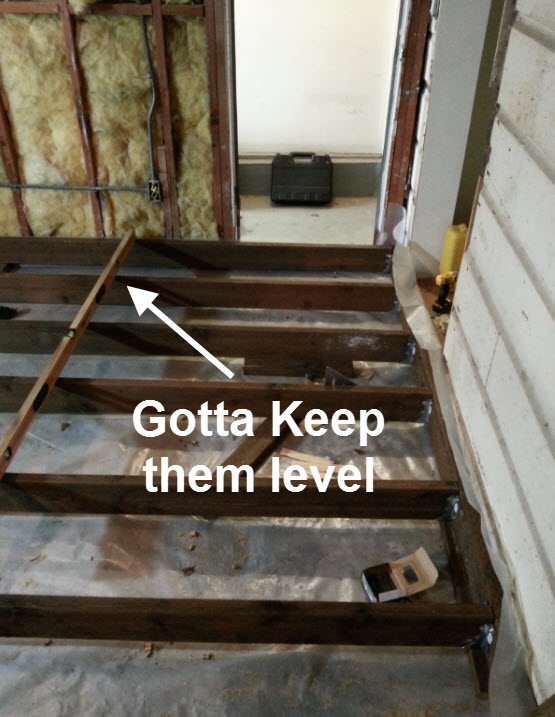
The first thing I did was attach two 2×6 Joist Headers to the wall studs on each side of the room. It was really important that the joist headers were as plumb and level as possible since the floor joists were going to be attached to those headers.
If the headers aren’t level (one side is higher than the other) or aren’t plumb (they are not installed straight up and down vertically) the floor will slope.
Once the Headers are installed on the two sides of the room, then it’s just about attaching the joists. Sounds easy enough, right?
Step 5 – Installing Floor Joists:
First thing you I did was purchase joist hangers. The joist hangers are sort of the construction world’s strapless bra (for all you ladies out there). Think of them as the over the shoulder header bolder joist holder hanger.

You can get these joist bras hangers at most hardware stores, and they usually display what size of wood they best accommodate. Since I’m working with 2×6’s, I purchased hangers that fit that size.
Next, I used the joist hangers (i.e.: the bras) to hold the floor joists, which stretch the length of the room, to the hangers. Since that is a lot of “joists” for one sentence, here’s a picture that might help explain what I’m talking about.

I installed the floor joists so that they were level with the header. That way, when I finally get to installing the plywood it should rest evenly on top.
Each time I installed a floor joist I also had to make sure it was level with all of the other joists I had already installed. Having a long (72″) level made that much easier.
Step 6 – Adding Support:
While 2×6’s are really strong, I didn’t want the floor to feel “squishy” or to sag since there is just air between the moisture barrier and the bottom of the joist. To try to reduce the risk of a squishy floor, I took two extra steps.
First, on the end of the room where the concrete sloping was lower, I screwed 2×4’s to the bottom of the floor joists. This gave the joists a little more support since otherwise there would just be air underneath.
Second, I installed “nogging,” which are additional supports that go between the floor joists.

I installed the nogging so they are just slightly lower than the floor joists. That way when I lay the plywood on top, it will actually rest on the joists and not on the nogging.
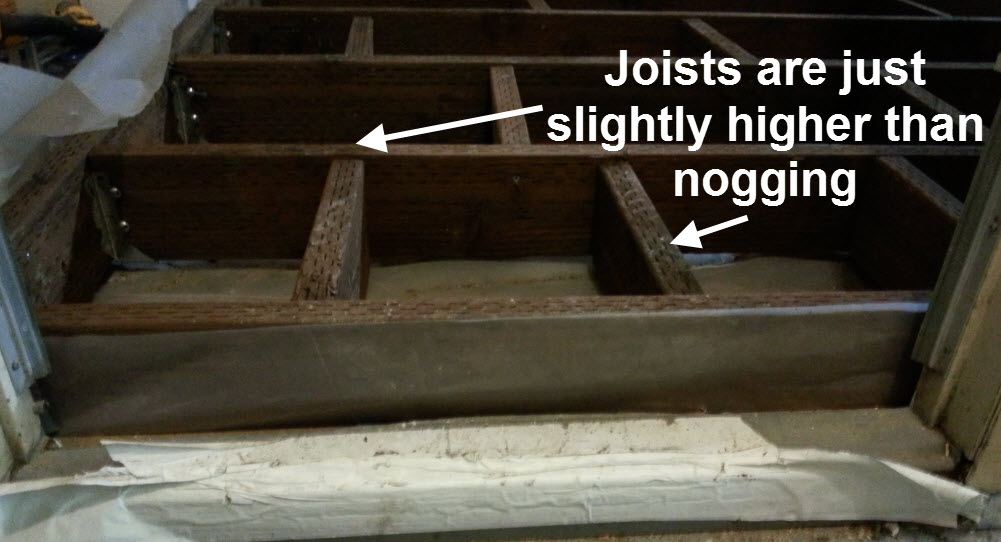
With this extra support, the floor feels really solid!
In the next installment of Building a Floor, I’ll be laying the plywood. That’s the fun part!!

Pingback: Building a Floor, Part 3 | Building With Beth