Building a Floor, Part 3
I know what you’re thinking…”finally, the end of the floor building saga!” (Okay, maybe that’s what I’m thinking). Either way, we’re correct! It’s true! This is the last post on building a sub-floor. I’m sure there will be other posts about laying hardwood, but let’s not get ahead of ourselves.
For those of you just joining us, feel free to catch up by checking out the last two posts on building a floor:
Originally I was planning on splitting the room into two and building half of the floor now and the other half at a later (to be determined) date. Some call the process of tackling a large project in smaller, more manageable, bites good project management. What those jokers clearly aren’t considering is that I am a procrastinator. I enjoy challenging the laws of physics by stacking my dishes into a Jenga-like tower rather than washing them.

Therefore, in an effort to keep this project from stretching into my golden years, I’ve decided to dump my previous approach and get this monstrosity of a floor finished.
Since I’ve already discussed the process of installing joists & headers in my earlier posts, I’ll give you a summary of that effort on the 2nd half of the room in picture form:
Installing The Rest Of The Joists:
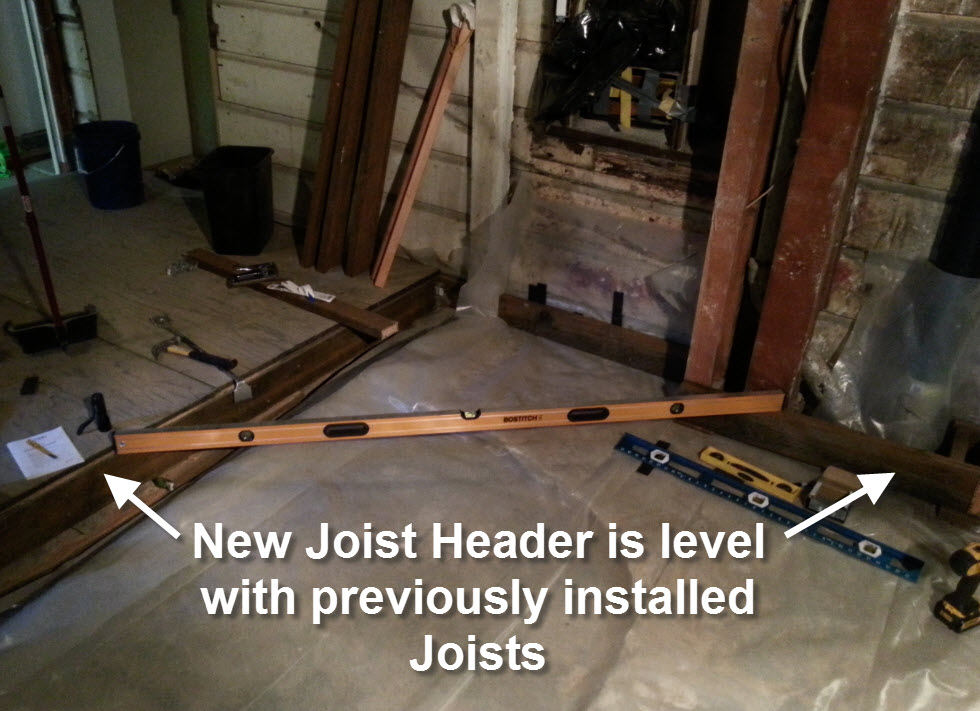
To ensure that the entire room has a level floor, the new Joist Headers needed to be installed at the same height as the previously installed headers. This is the perfect opportunity to utilize Jetson’s level modern technology. The laser level! With one flip of a switch, I was able to shoot a laser-beam around the room and measure off of that level line.

Nothing can take away the joy of using laser-beams. Even the process of installing a level Joist Header beside a recently replaced poop-pipe and ancient gas line that juts out of the wall.
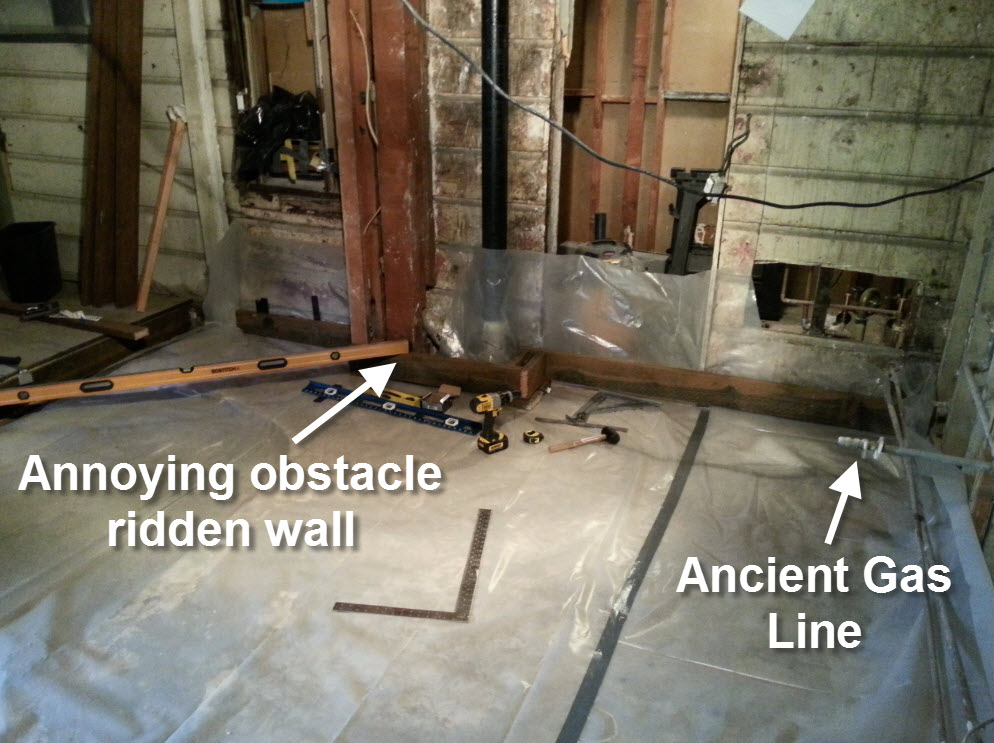
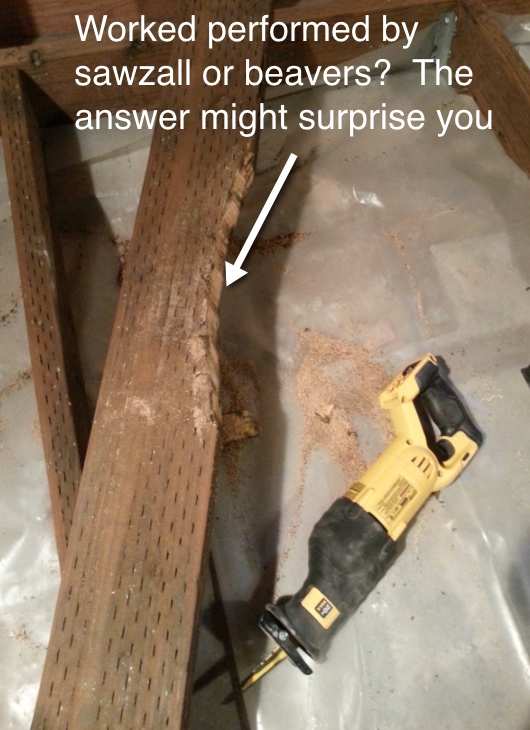
Unfortunately, the floor is covered in bumps and humps and other uneven things that need to be built around. This required a little hacking of the joists to make them lay level.
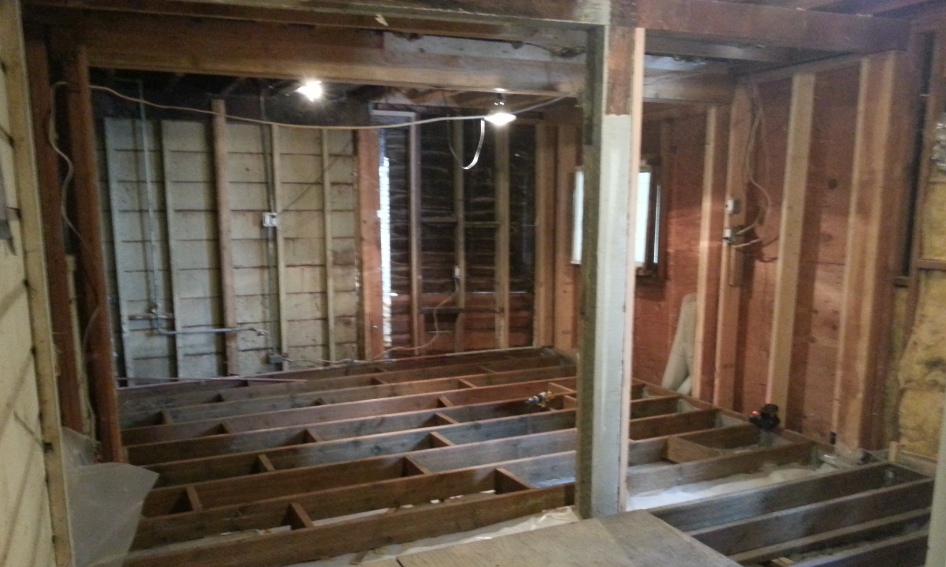
Finally, the joists are built and are ready for some plywood!
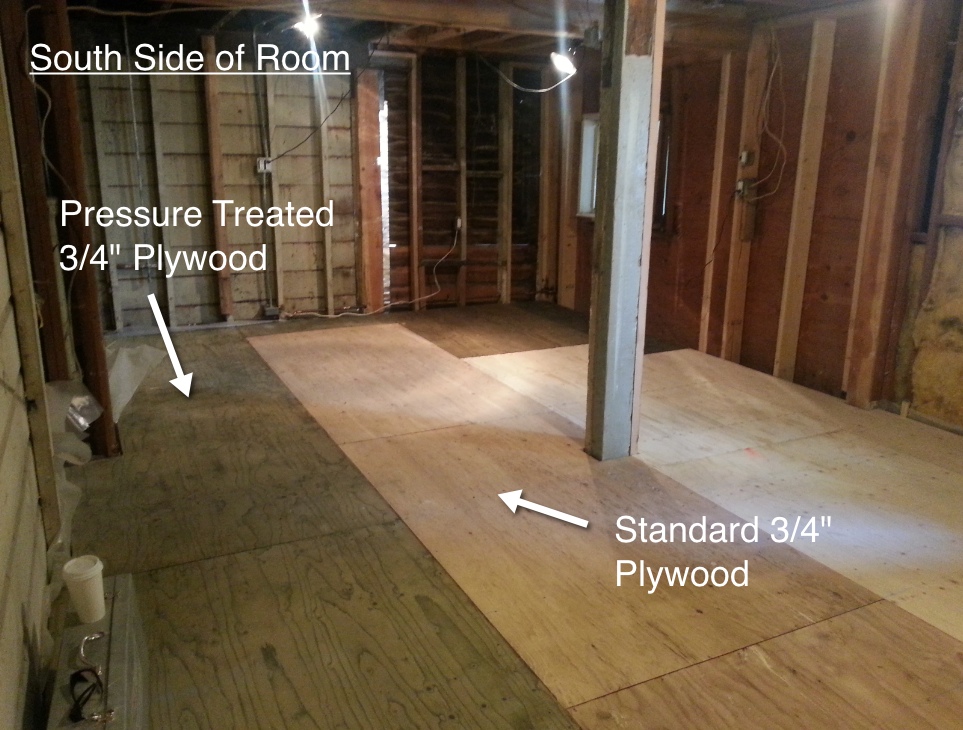
Step 7 – Get Some Plywood:
I decided to use a mixture of pressure treated and regular plywood. I’m going to put the pressure treated plywood along the walls and anywhere there is a risk of moisture. Since pressure treated plywood is a little more expensive and isn’t needed on the whole room, the rest of the space will use regular plywood.
All of the plywood is tongue & groove, so it should fit together tightly.

In theory, the tongue should fit snuggly into the groove. In reality, you have to MAKE the tongue fit into the groove by summoning all of your physical, mental and emotional strength.
After purging yourself of that strength, you will then find the clarity of mind to either cut the tongue off in a swift and satisfyingly decisive whack with a circular saw, or you will take my approach, which was to use a small hand plane to smooth out the tongue so it will slide into the groove effortlessly.
Step 8 – Marking Joists:
Before we move onto laying the plywood we need to mark the joists. By marking where the joists are, you’ll have a much easier time screwing the plywood into the floor. Being the techo-geek that I am, I like to use the latest in modern technology to mark my floor joists…the Sharpee and Chalk Line:
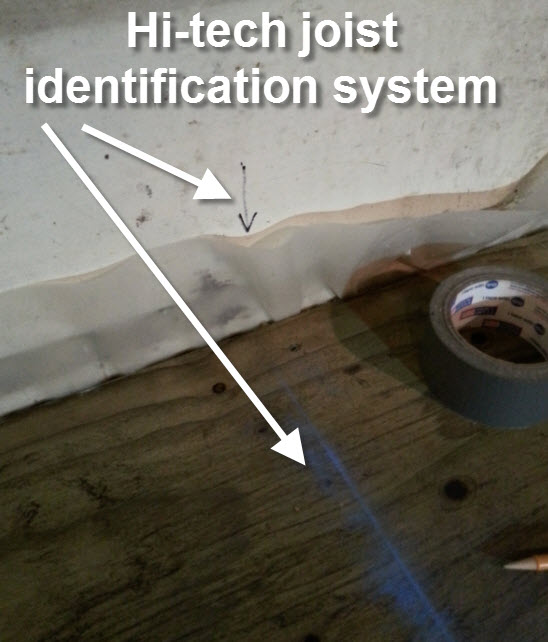
Then I just take my chalk line and stretch it from the joist marking to the end of the plywood. When I get to the point where I’m gluing the plywood down, I’ll I need to do is place screws on that chalk line.
Step 8 – Screwing & Gluing:
Next step, screwing & gluing! That’s exactly what we’re going to do with that plywood. The plywood is glued to the joists to reduce squeaking, and is then screwed into place to reduce movement.
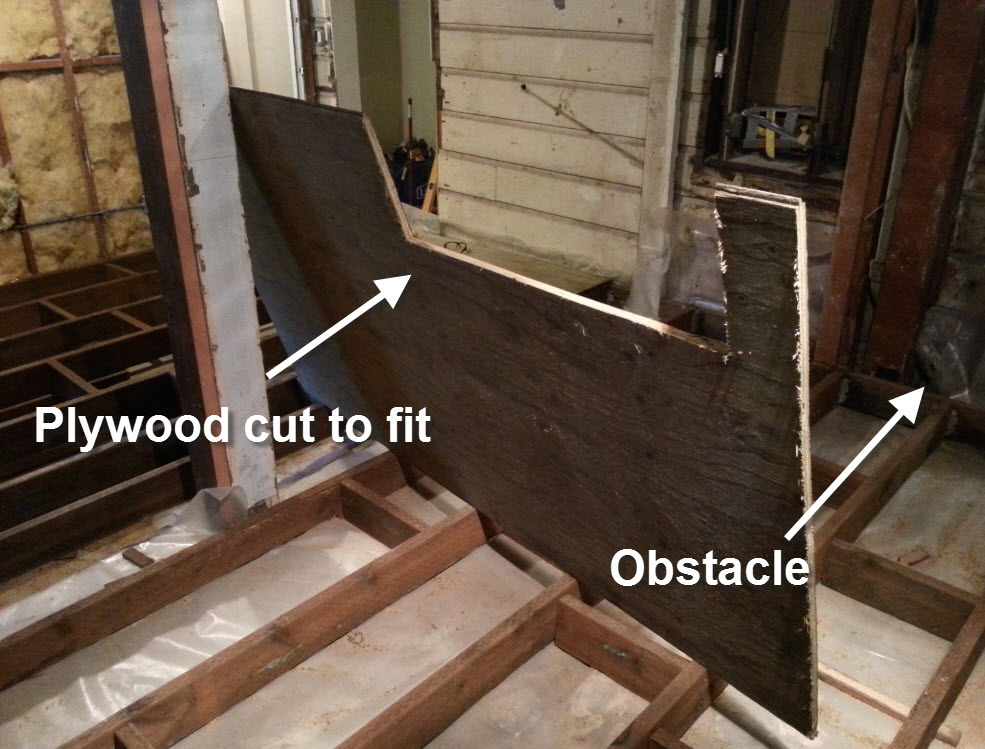
To prep for the screwing & gluing process, I find it easier to lay things out to make sure the pieces will fit where you expect them to. In some cases you will need to cut the plywood around obstacles:
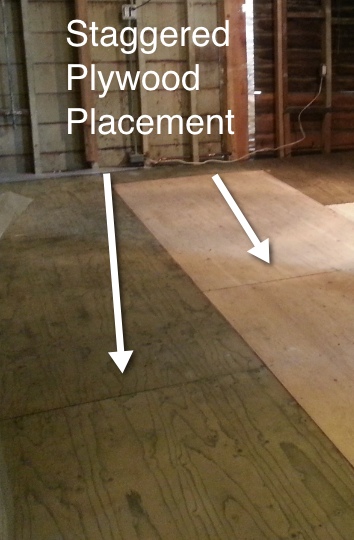
Then I lay the plywood down so that the seams are staggered (like when you lay brick). This will reduce the possibility of them moving along a seam and causing problems down the line with the future hardwood floor.
Then, in a whirlwind of a week you get a FINISHED FLOOR!
Step 9 – Enjoy Your New Sub-Floor!
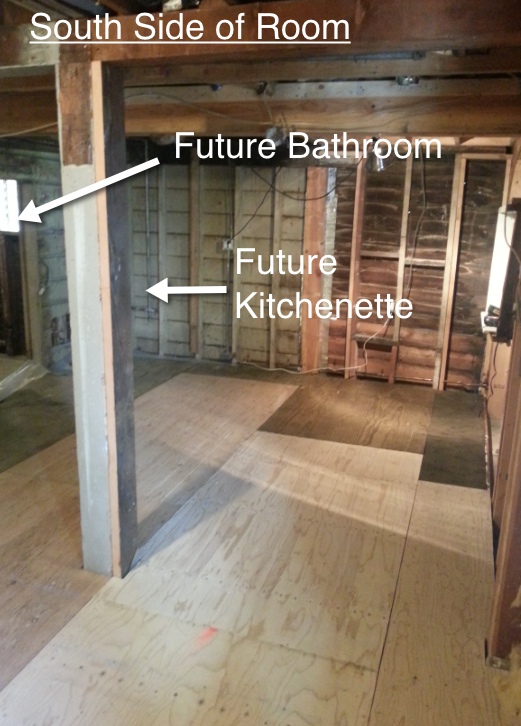
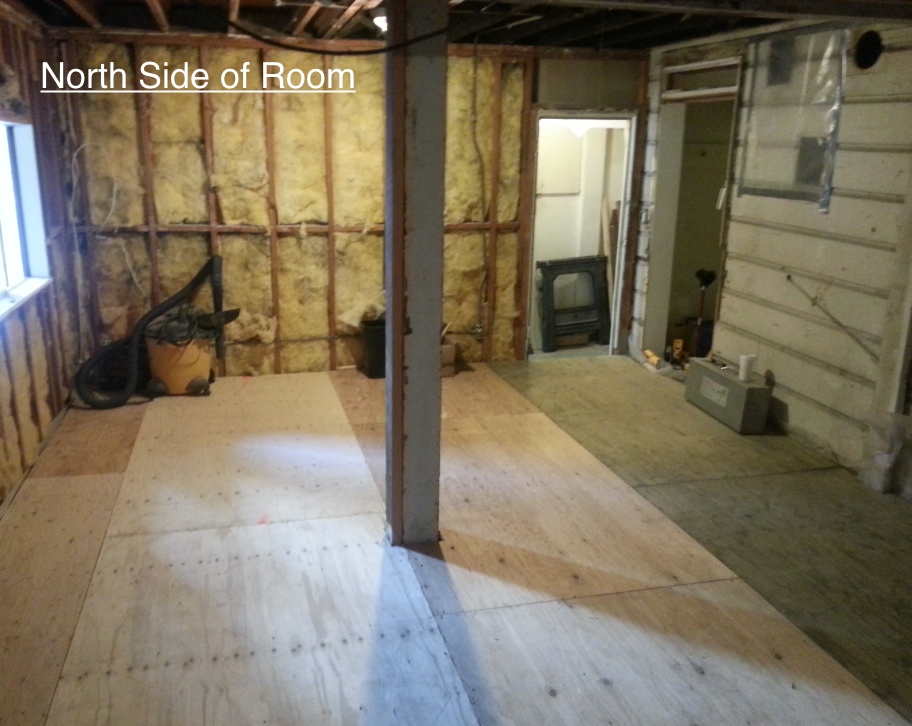
Ta Da! A new floor, ready for dance parties and musical reenactments. I have already certified that one can channel Julie Andrews, and spin wildly in a circle, arms outstretched in joy! What more does one need from a new floor?


Wow!! Magnificent!
I am beyond impressed! I am delighted to learn that the Munger sense of humor is still thriving…Aunt Vernie
what a gorgeous subfloor (and I mean it)! so beyond impressed that you’re finding time to write an entertaining and educational blg in addition to the renos.