Building A Floor, Part 1
I’ve finally moved past the planning phase and onto the floor building phase. Well, at least half of the floor building. I’ve decided to split the room, and thus the effort, into two phases. The main reason for this is because the two halves of the room are significantly different, both in elevation and in their level of disrepair.
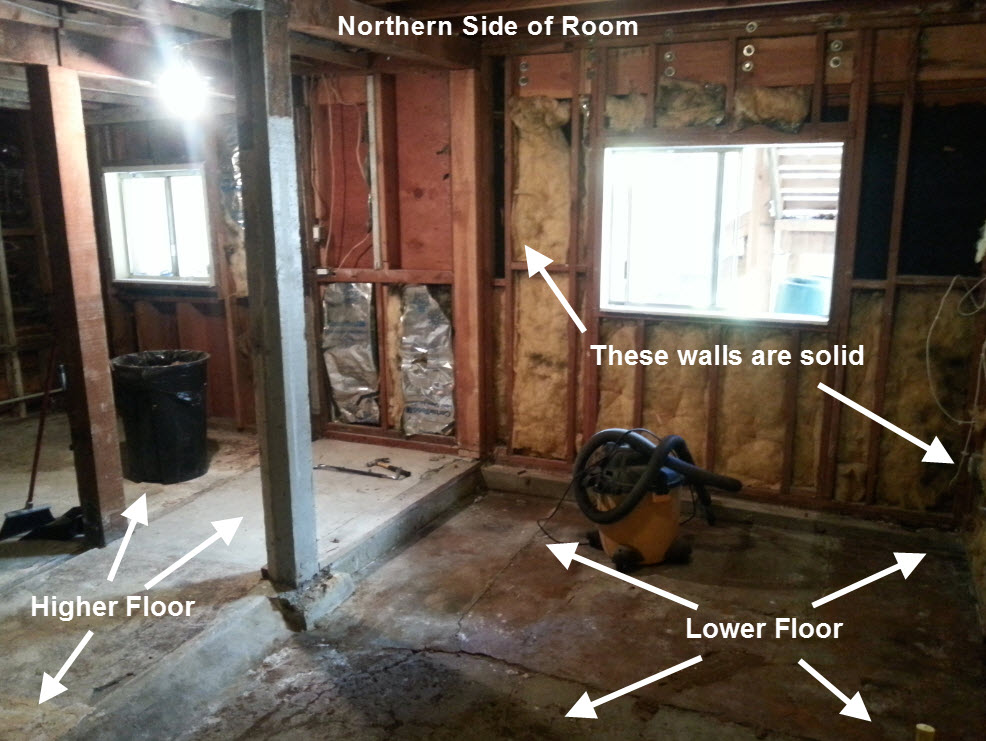
The Northern part of the room is newer construction that is in pretty good shape, however, the floor is significantly lower than the rest of the room:
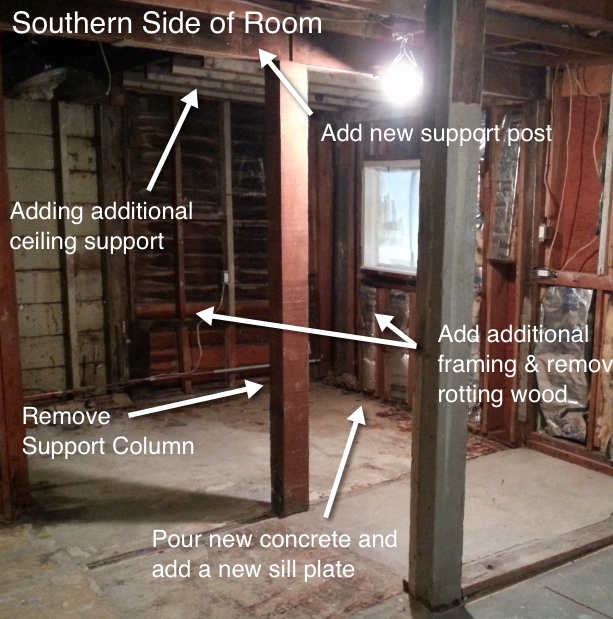
The Southern side of the room needs some pretty major repair work. I’m bringing in my contractor to help me move one of the structural columns, as well as shore up the ceiling where we found the old (and rotting) deck. In order to have plenty of room to do that work, I’ll be holding off on building the floor on that side of the room for at least a couple of weeks.
For now, I’ll be focusing my efforts on building the floor on the Northern side of the room. As you may recall in my last post, I was taking some time off to let my back heal and to come up with a fool-proof attack plan! Of course, in my mind that plan included huge pieces of wood magically appearing in the work space, cut to the proper length and ready to snap into place in a perfectly level and plum grid.
(I just want to say that I blame Ikea, and Disney movies for my magical thinking)
As it turns out, adorable little birds are too small to carry such heavy wood. Therefore, we will have to take the task of building a floor step by step.
Step 1, the Plan:
You can refresh your memory by checking out the plan in my last post by clicking here
Step 2, Acquisition Of Materials:
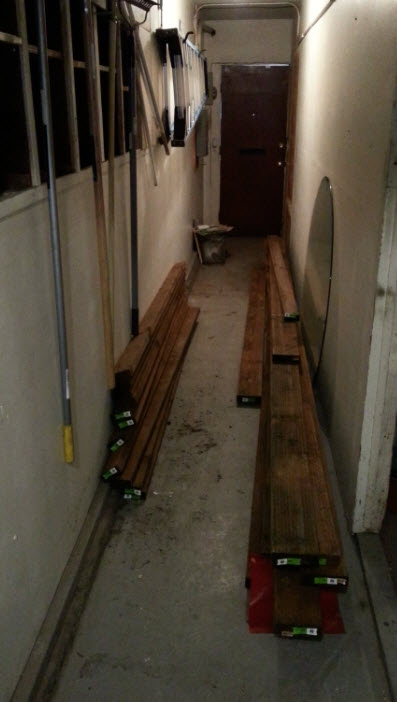
I’m lucky in that San Francisco has a number of locations to purchase lumber; therefore, I’m never further than a few blocks away from a lumber yard. With that said, getting the wood home was still quite the task. I would have loved to have taken a self-portrait of myself, lifting the massive amounts of wood onto my car in full She-ra mode, but in the end it was simply too hard to juggle the camera.

Despite my lack of physical evidence, I was able to lift the wood onto the car, and drive it home.

From the car, to the hallway…and done! (well, not quite)
Step 3, Site Preparation:
The In Law unit floor was not only dirty, but also had some major cracks/holes in the concrete. I’m pretty sure at least one of those holes was Ricky’s front door, which only moderately freaked me out. I’m sure the trauma of having a zombie rat fly from the rafters at my face will wear off in no time.
I decided that rather than just building on top of the cracked concrete, I would go ahead and take the extra steps to fill in those holes. I first vacuumed and cleaned the space and then applied a concrete bonding agent. The bonding agent acts like a glue for the concrete. Without it, the concrete would have a hard time sticking to the other concrete in the space.
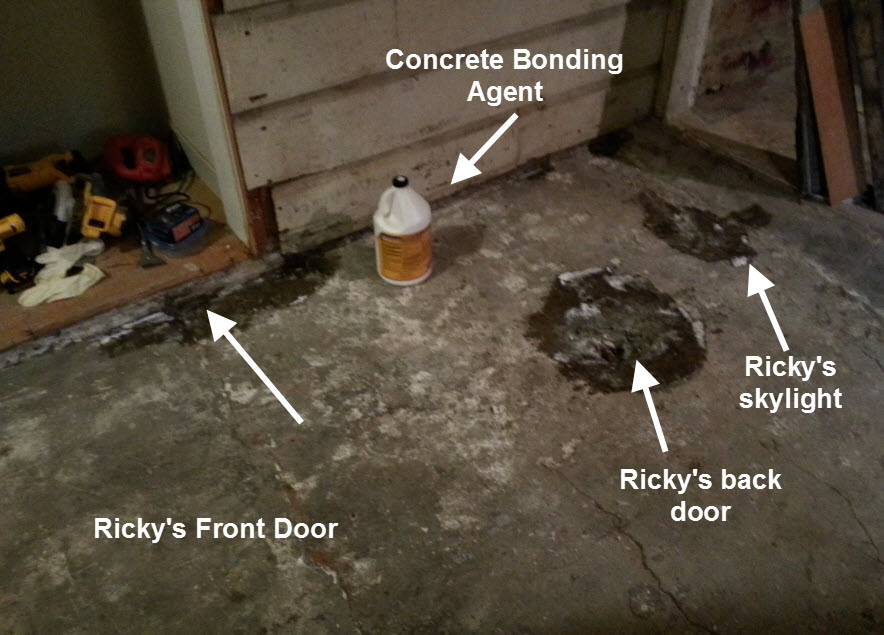
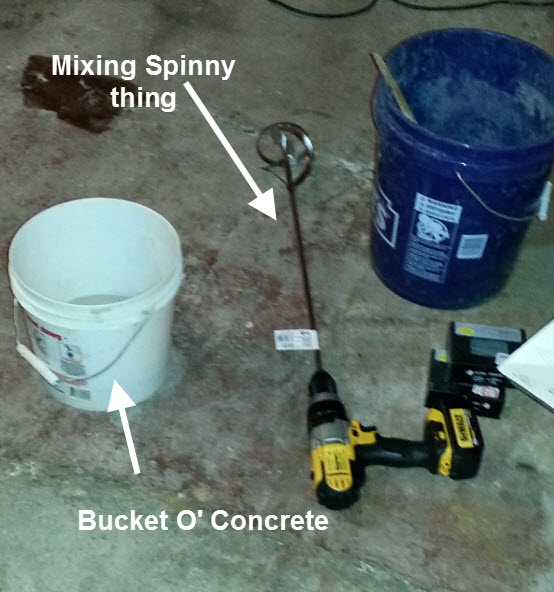
Once the bonding agent was dry I was able to mix the concrete and fill the holes.
I gave the concrete 24 hours to dry, but I’m pretty sure it was the fast setting kind so it would have been ready in just about 3 or 4 hours.
Once it was dry I spread out a sheet of 6 mil plastic moisture barrier that I will be building on top of. While pressure treated wood should be able to be placed directly on top of concrete without a problem, since this space has been known to have moisture issues I’m taking a few extra steps to try to keep the space dry.

To keep the plastic from sliding around I stapled it to the walls. Eventually, I will be taping the plastic to a moisture barrier that I will stretch across the wall, creating a sealed (water-resistant) enclosure. I know it may be hard to picture, but I’ll explain that more when we get to that stage of the project.
Step 4 – Building
Now that the materials are purchased, the floor is clean, the holes are filled, and the concrete is covered with plastic, I can start building. Unfortunately, those first few steps took pretty much all weekend. Please stay tuned for Part 2 on building a floor! Assuming things go as planned, that should be completed this weekend.
With that said, so far things have not gone as planned, so we will see what surprises are in store for me over the next few days.

What you are doing is amazing!
Pingback: Building A Floor, Part 2 | Building With Beth
Pingback: Building a Floor, Part 3 | Building With Beth